
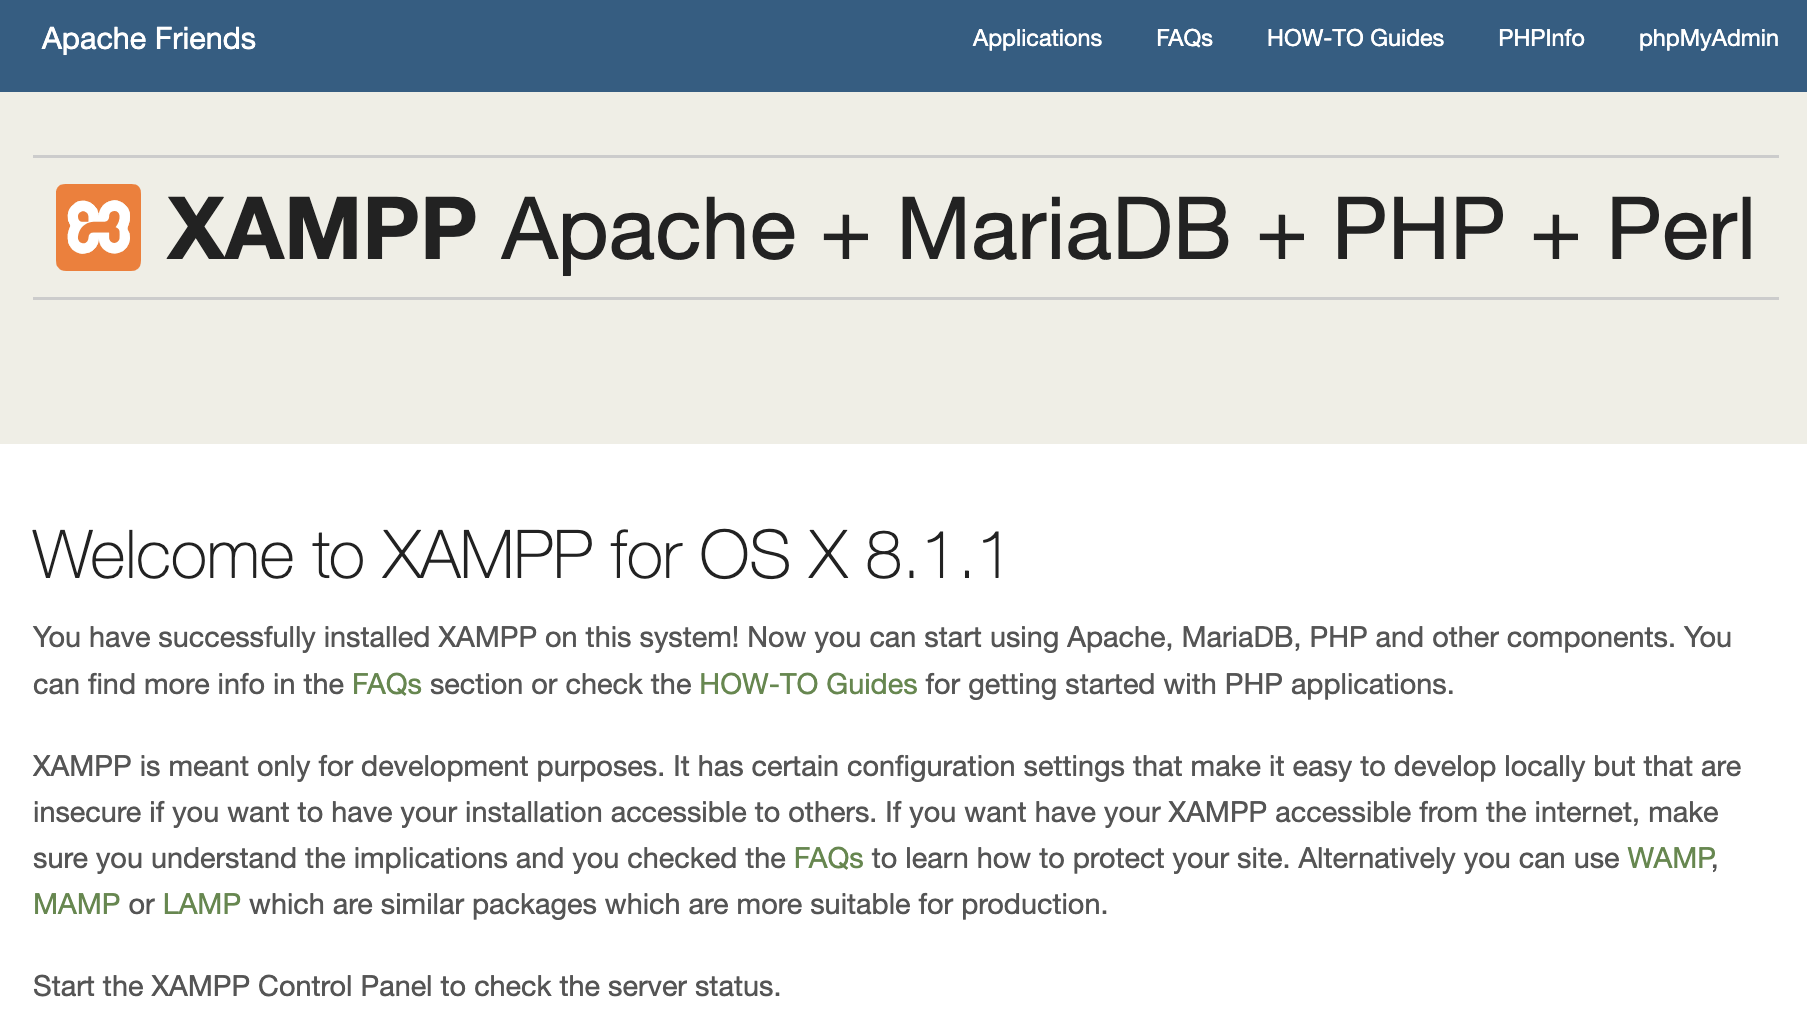
Xampp is a software bundle that includes the Apache HTTP Server, MySQL database, PHP scripting language and phpMyAdmin. Xampp is available as a free package that you can use to create a server hosting environment in your own computer. If you are just starting out with xampp, it’s important to know how to set up the xampp environment and the most basic configuration on it. In this article we will learn how to install and configure xampp.Features:
WordPress doesn’t have database access by default. You can use MySQL for storing and retrieving data with WordPress by using a database management system known as xampp . I learned that xampp is a collection of tools which enable you to run a localhost server on your computer from which you can use database. In this tutorial, I will walk through installing xampp on Windows and then how to use database with WordPress, how to use xampp for mysql and how to export database in xampp.
How to use xampp for database
XAMPP is an open source package that is widely used for PHP development. XAMPP contains MariaDB, PHP, and Perl; it provides a graphical interface for SQL (phpMyAdmin), making it easy to maintain data in a relational database.
If you have not installed XAMPP, please refer to聽XAMPP-setup聽to install and set up XAMPP.
Assuming that you have already set up XAMPP
- Start the database server (“MySQL Database”)
- Start the PHP environment (“Apache Web Server”)
Note: phpMyAdmin runs on a PHP environment. To use phpMyAdmin to manage databases, Apache Web server must be started.
Reminder: be sure to stop the server when you are done. Leaving the servers running consumes energy and may later prevent the servers from starting (in particular, MySQL server).
Access phpMyAdmin
- Open a web browser, enter a URL http://localhost to access XAMPP dashboard
- Select phpMyAdmin tab
Alternatively, you may access phpMyAdmin via the XAMPP manager / controller, click Go to Application button to access XAMPP dashboard.
The main page should look similar to the following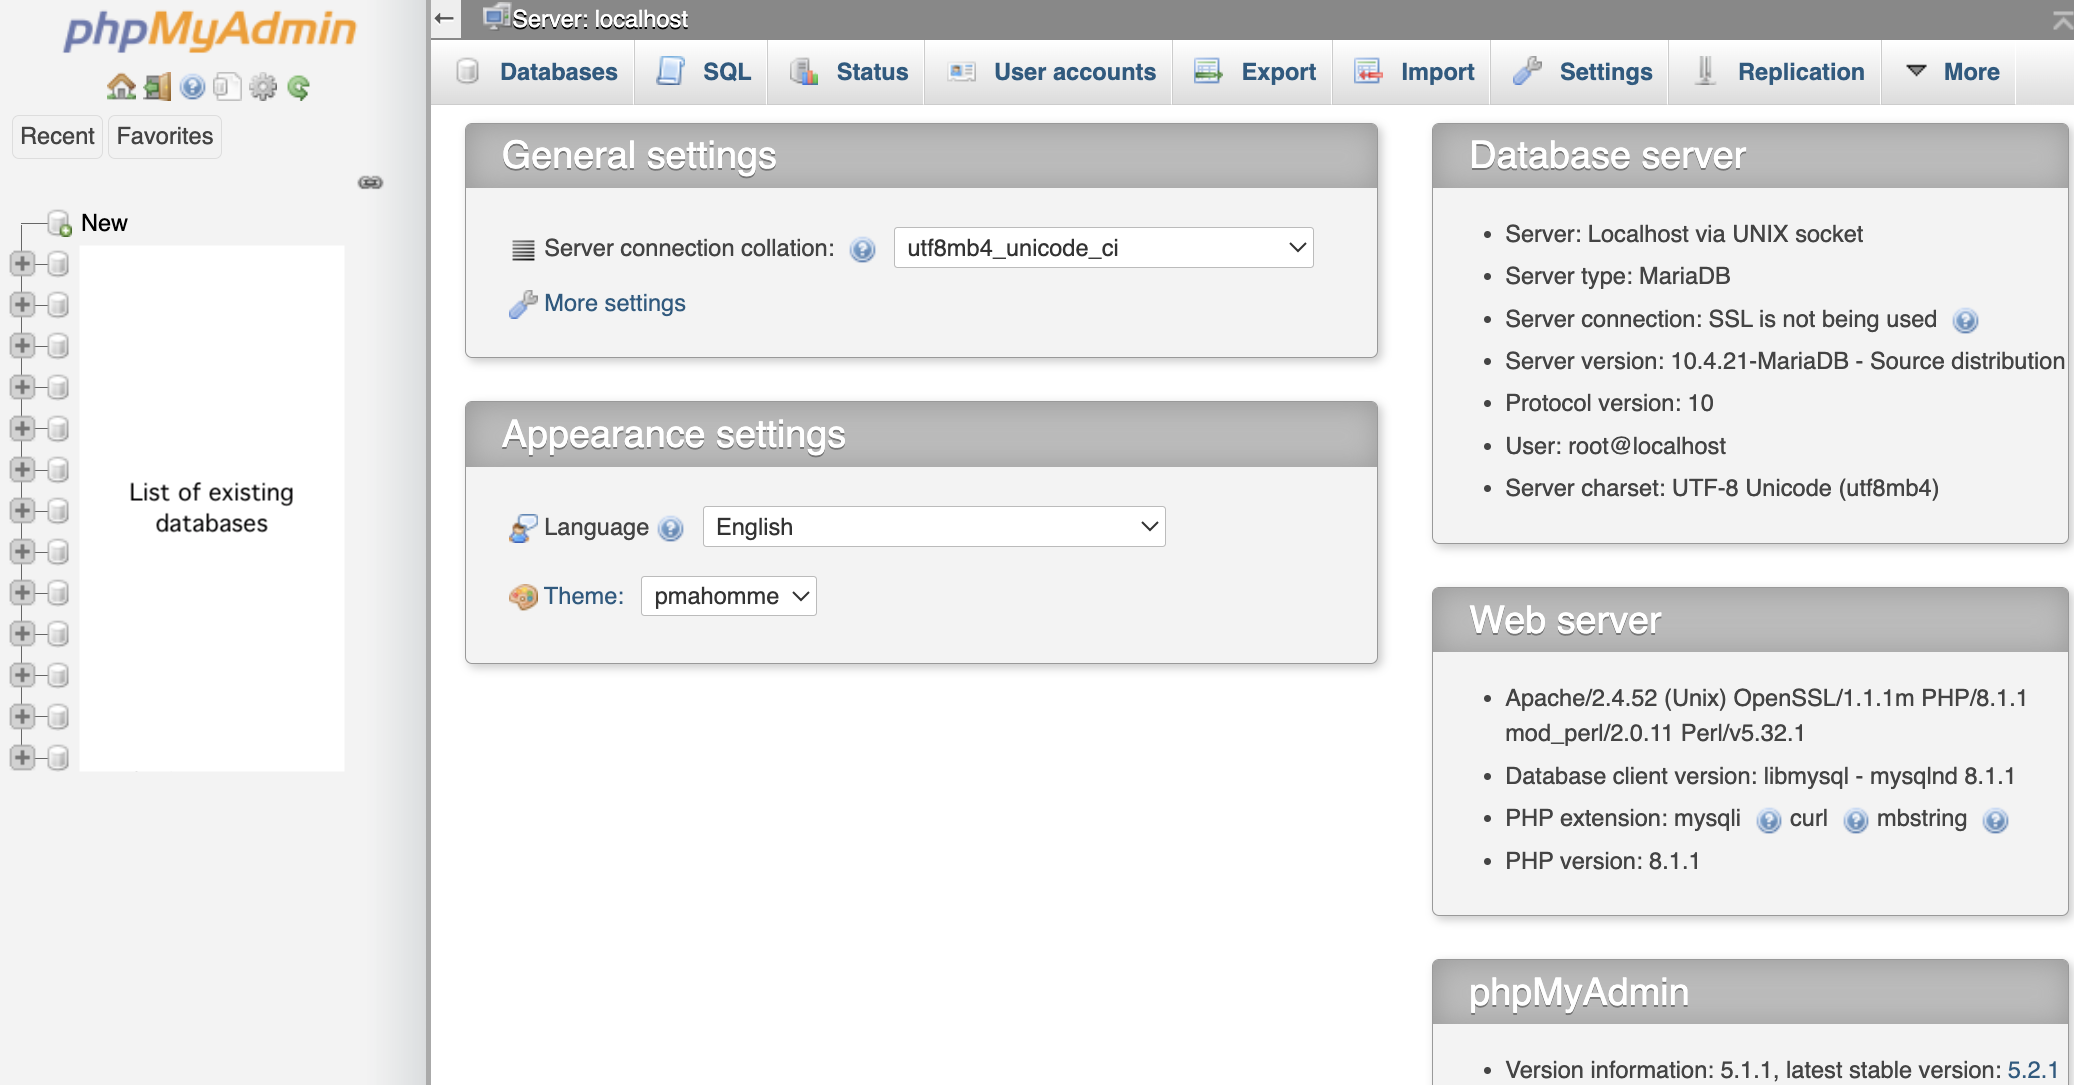
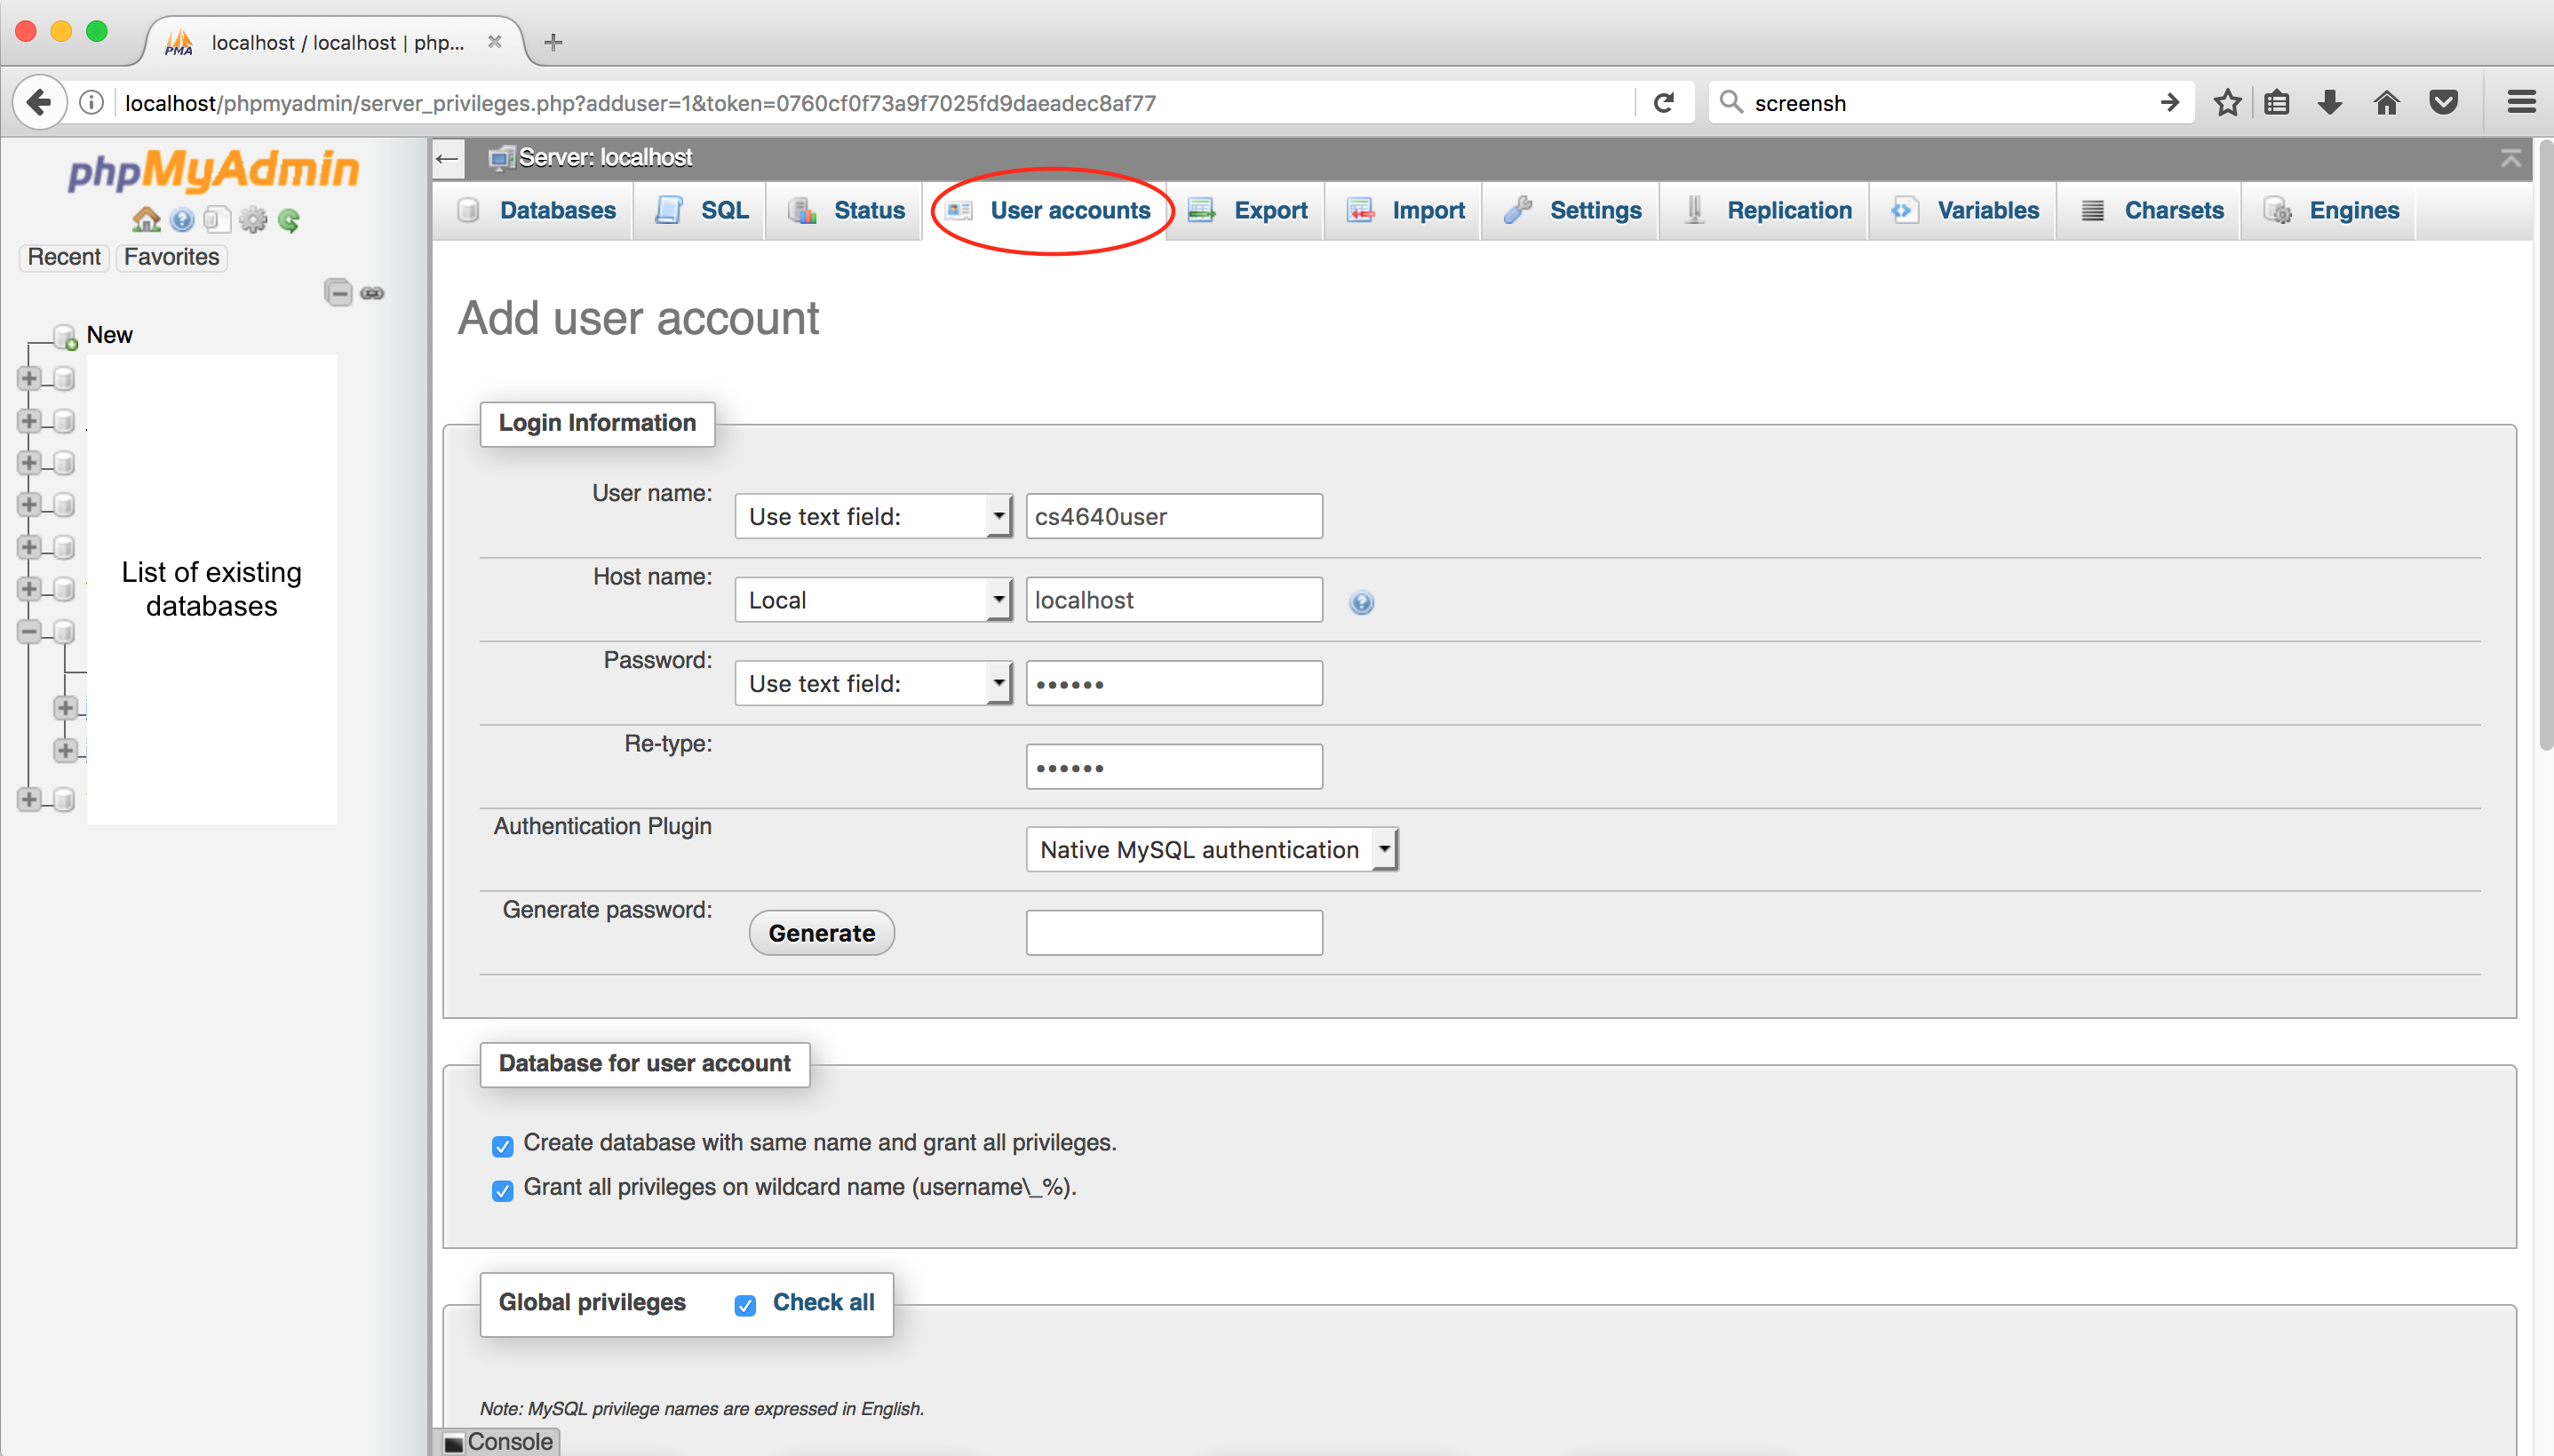
Add a user account
- On the phpMyAdmin screen, select User accounts tab.
- Select Add user account link.
- Enter user name and password of your choice. Note: do not use any of your official accounts such as UVA account.
- Select Local for Host name
- Check Create database with same name and grant all privileges
- Check Grant all privileges on wildcard name (username\_%)
- Check Check all for Global privileges
- At the bottom-right of the screen. click the Go button
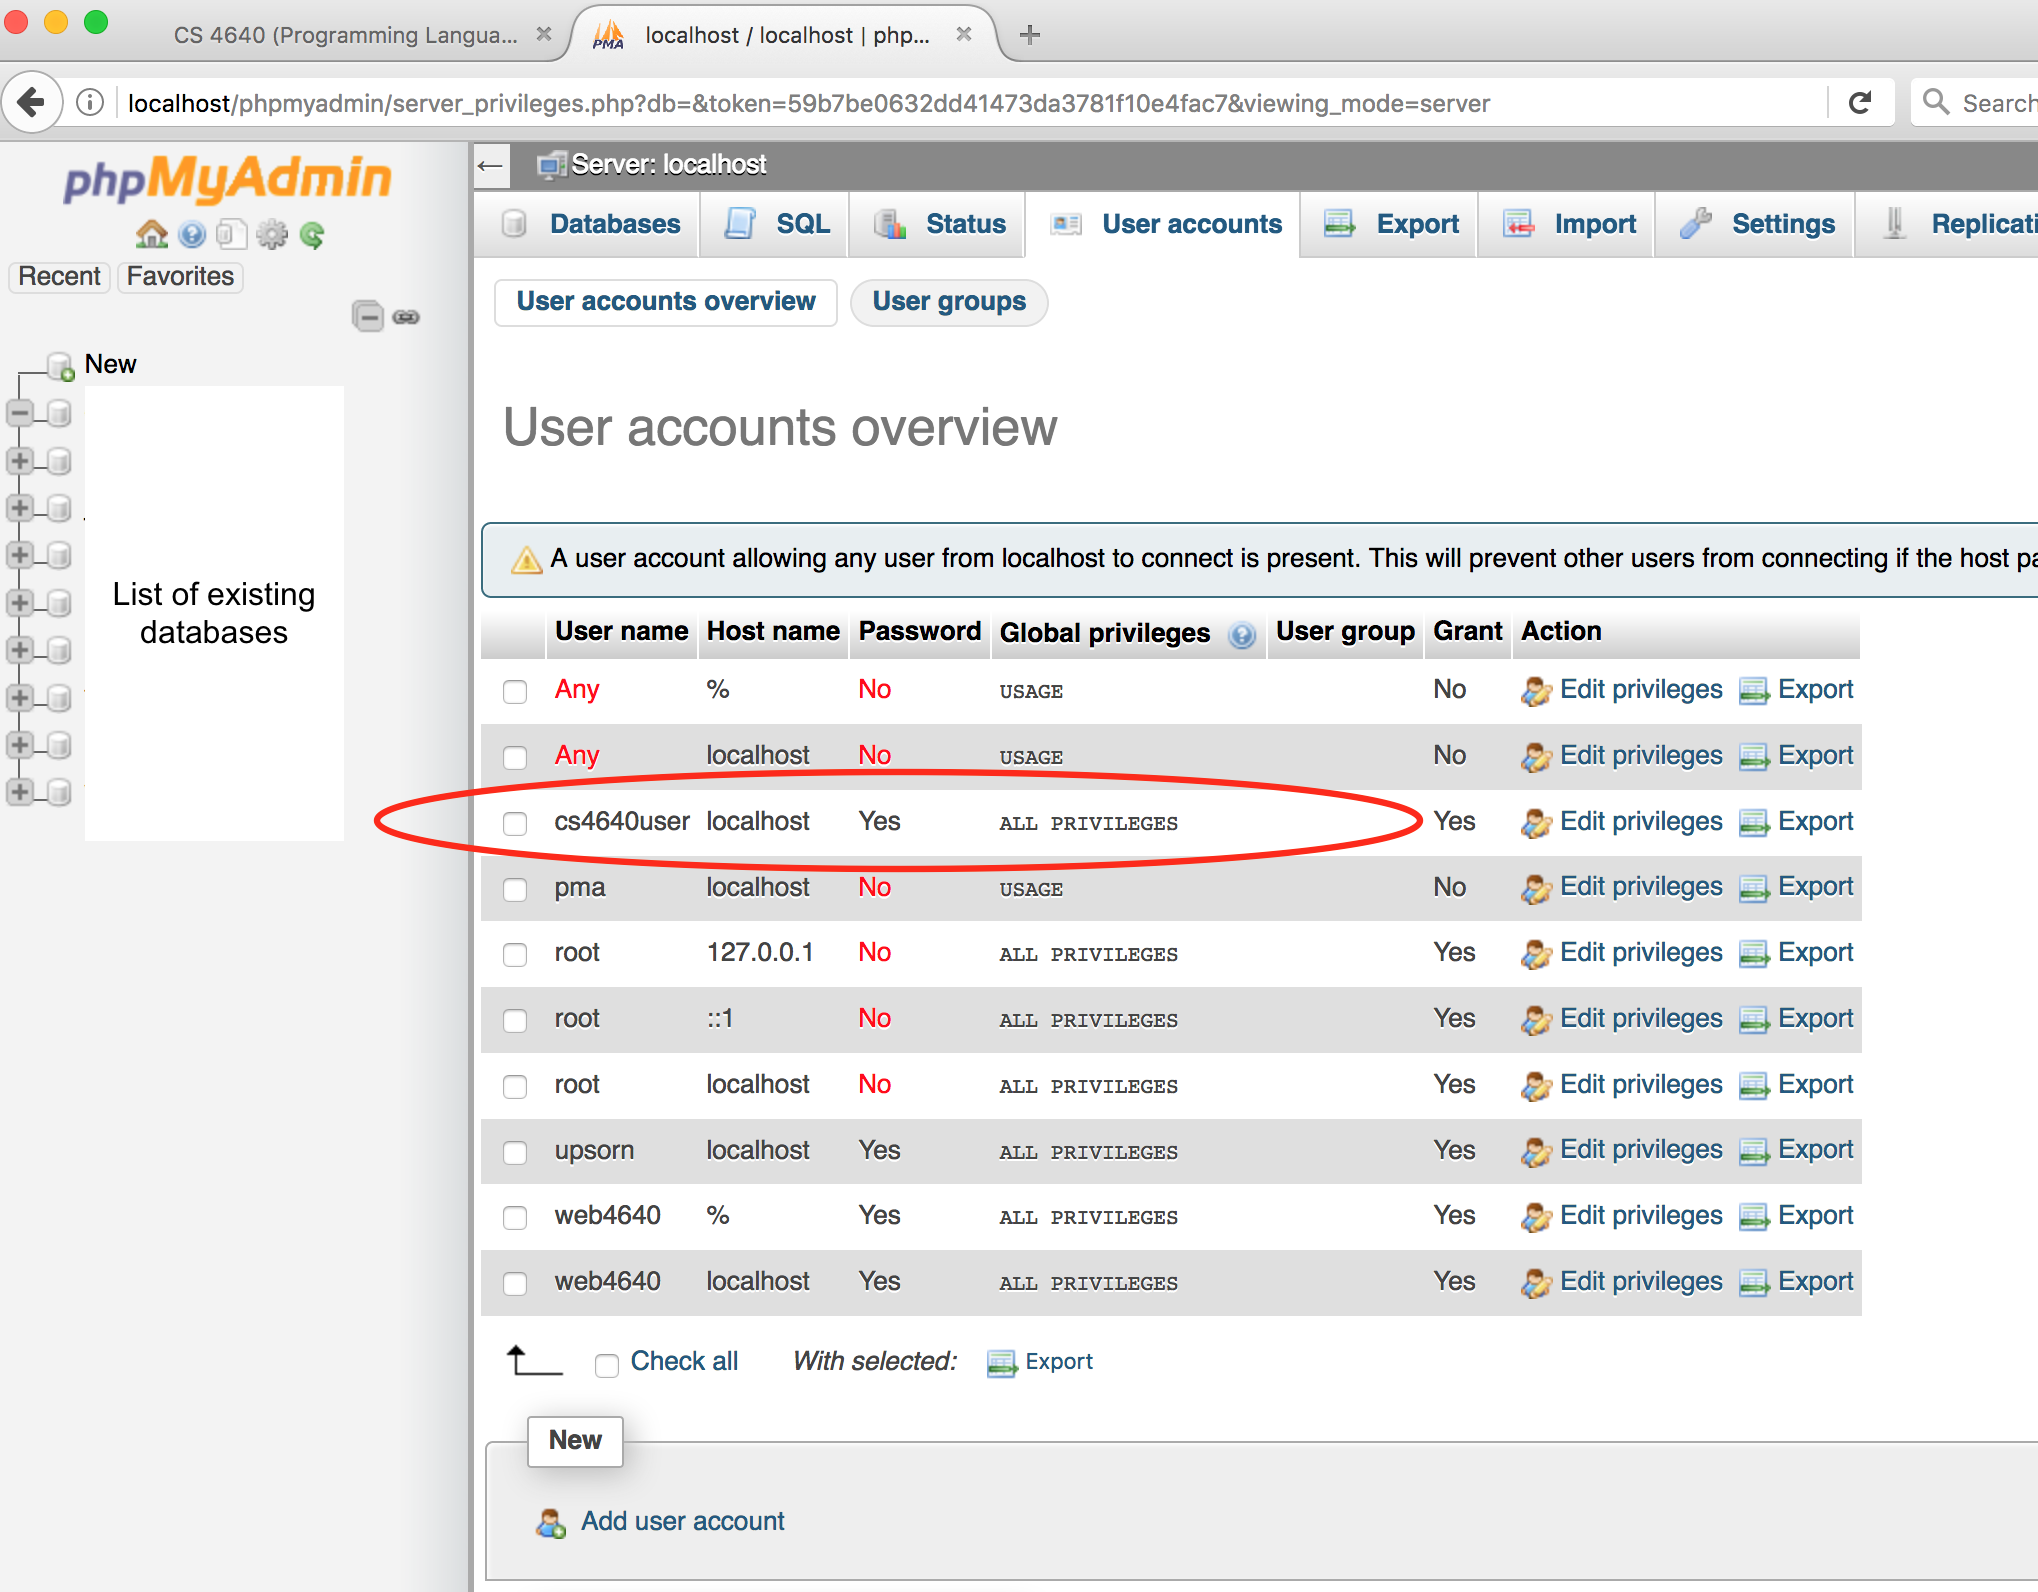
Do not change or update the root account. If you may forget or need to reset your password, you can use the root account to manage users.
To verify that the account has been created, go to User accounts tab. You should see the newly created user account (as shown below).
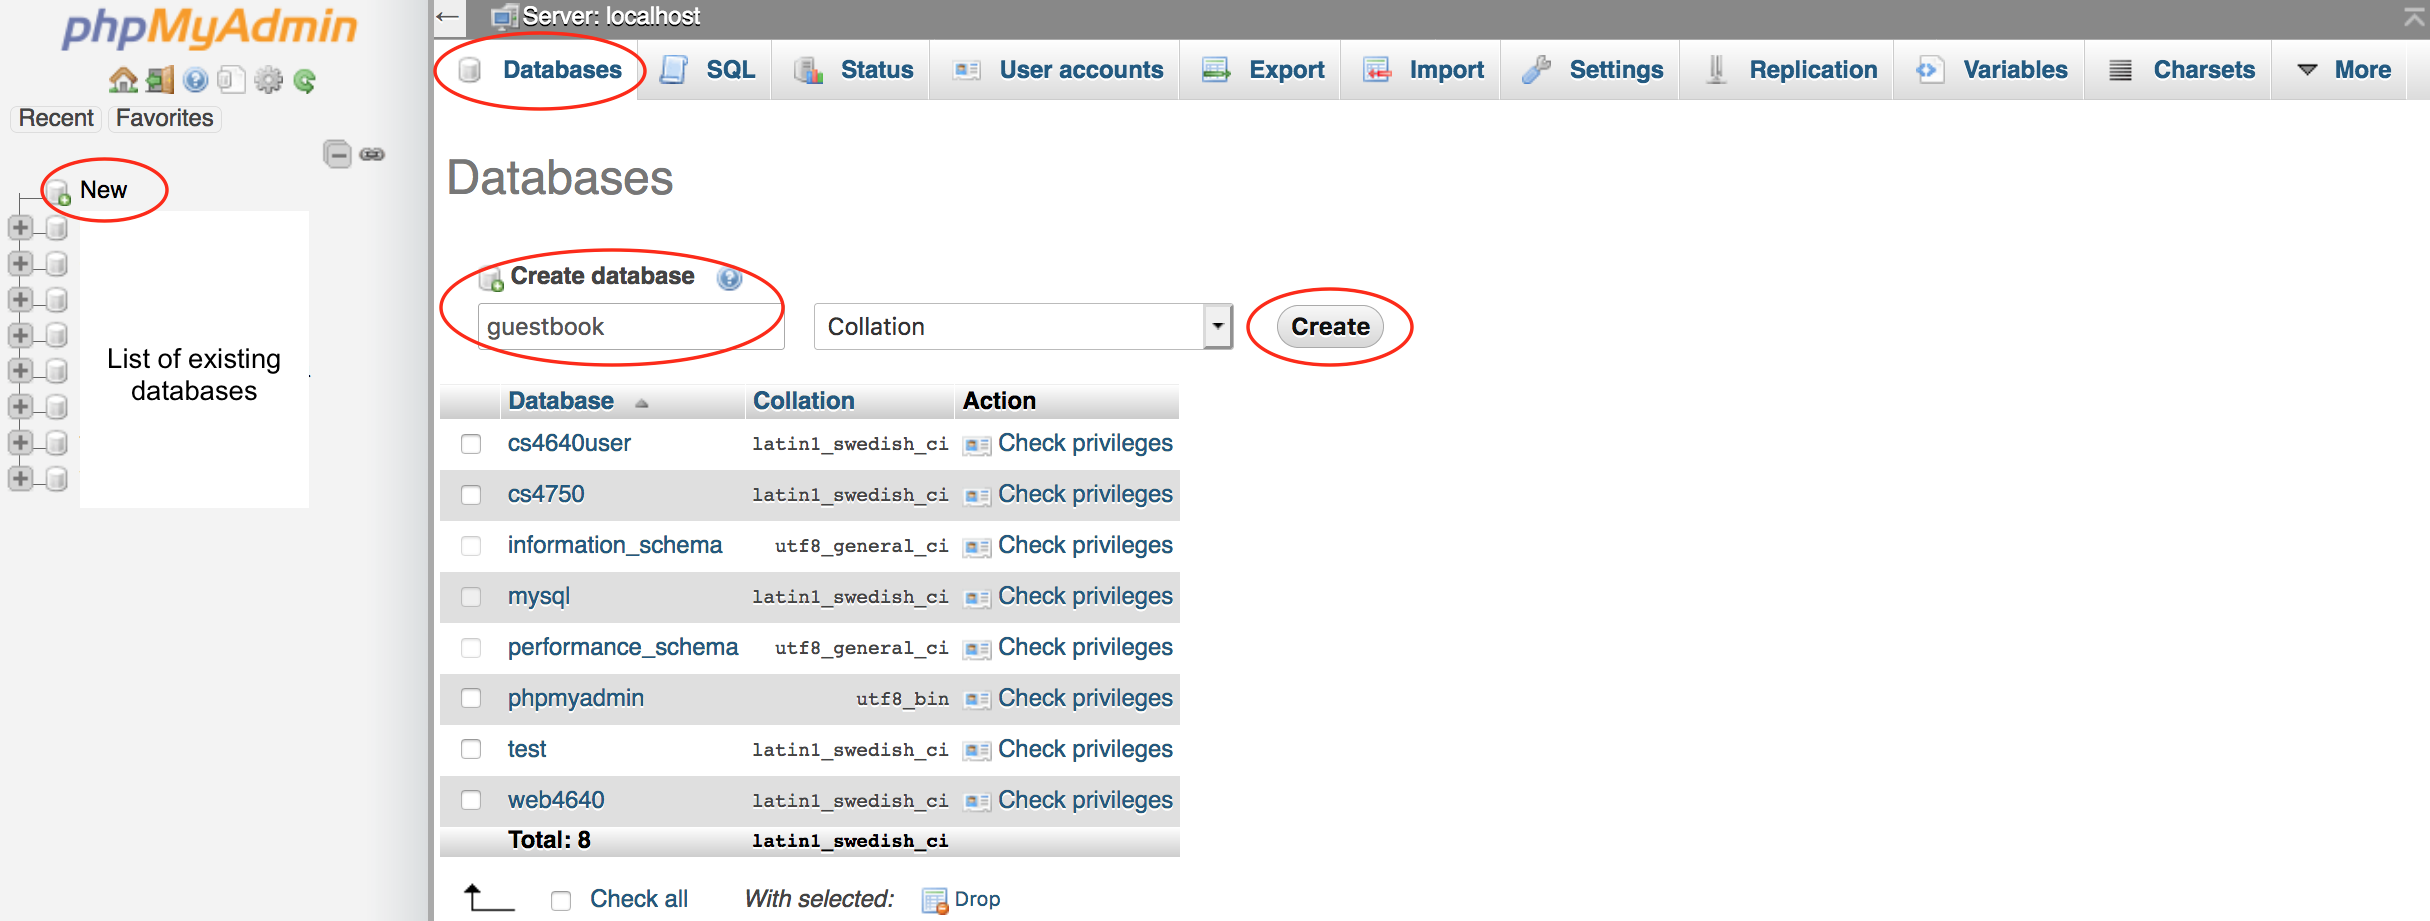
Create a database
Let’s create a guestbook database. To create a database, there are several options.You may use the Create database
feature.
- On the phpMyAdmin screen, select the Databases tab. Alternatively, you may click the New link on the left panel.
- Under the Create database, enter a Database name
- Click the Create button
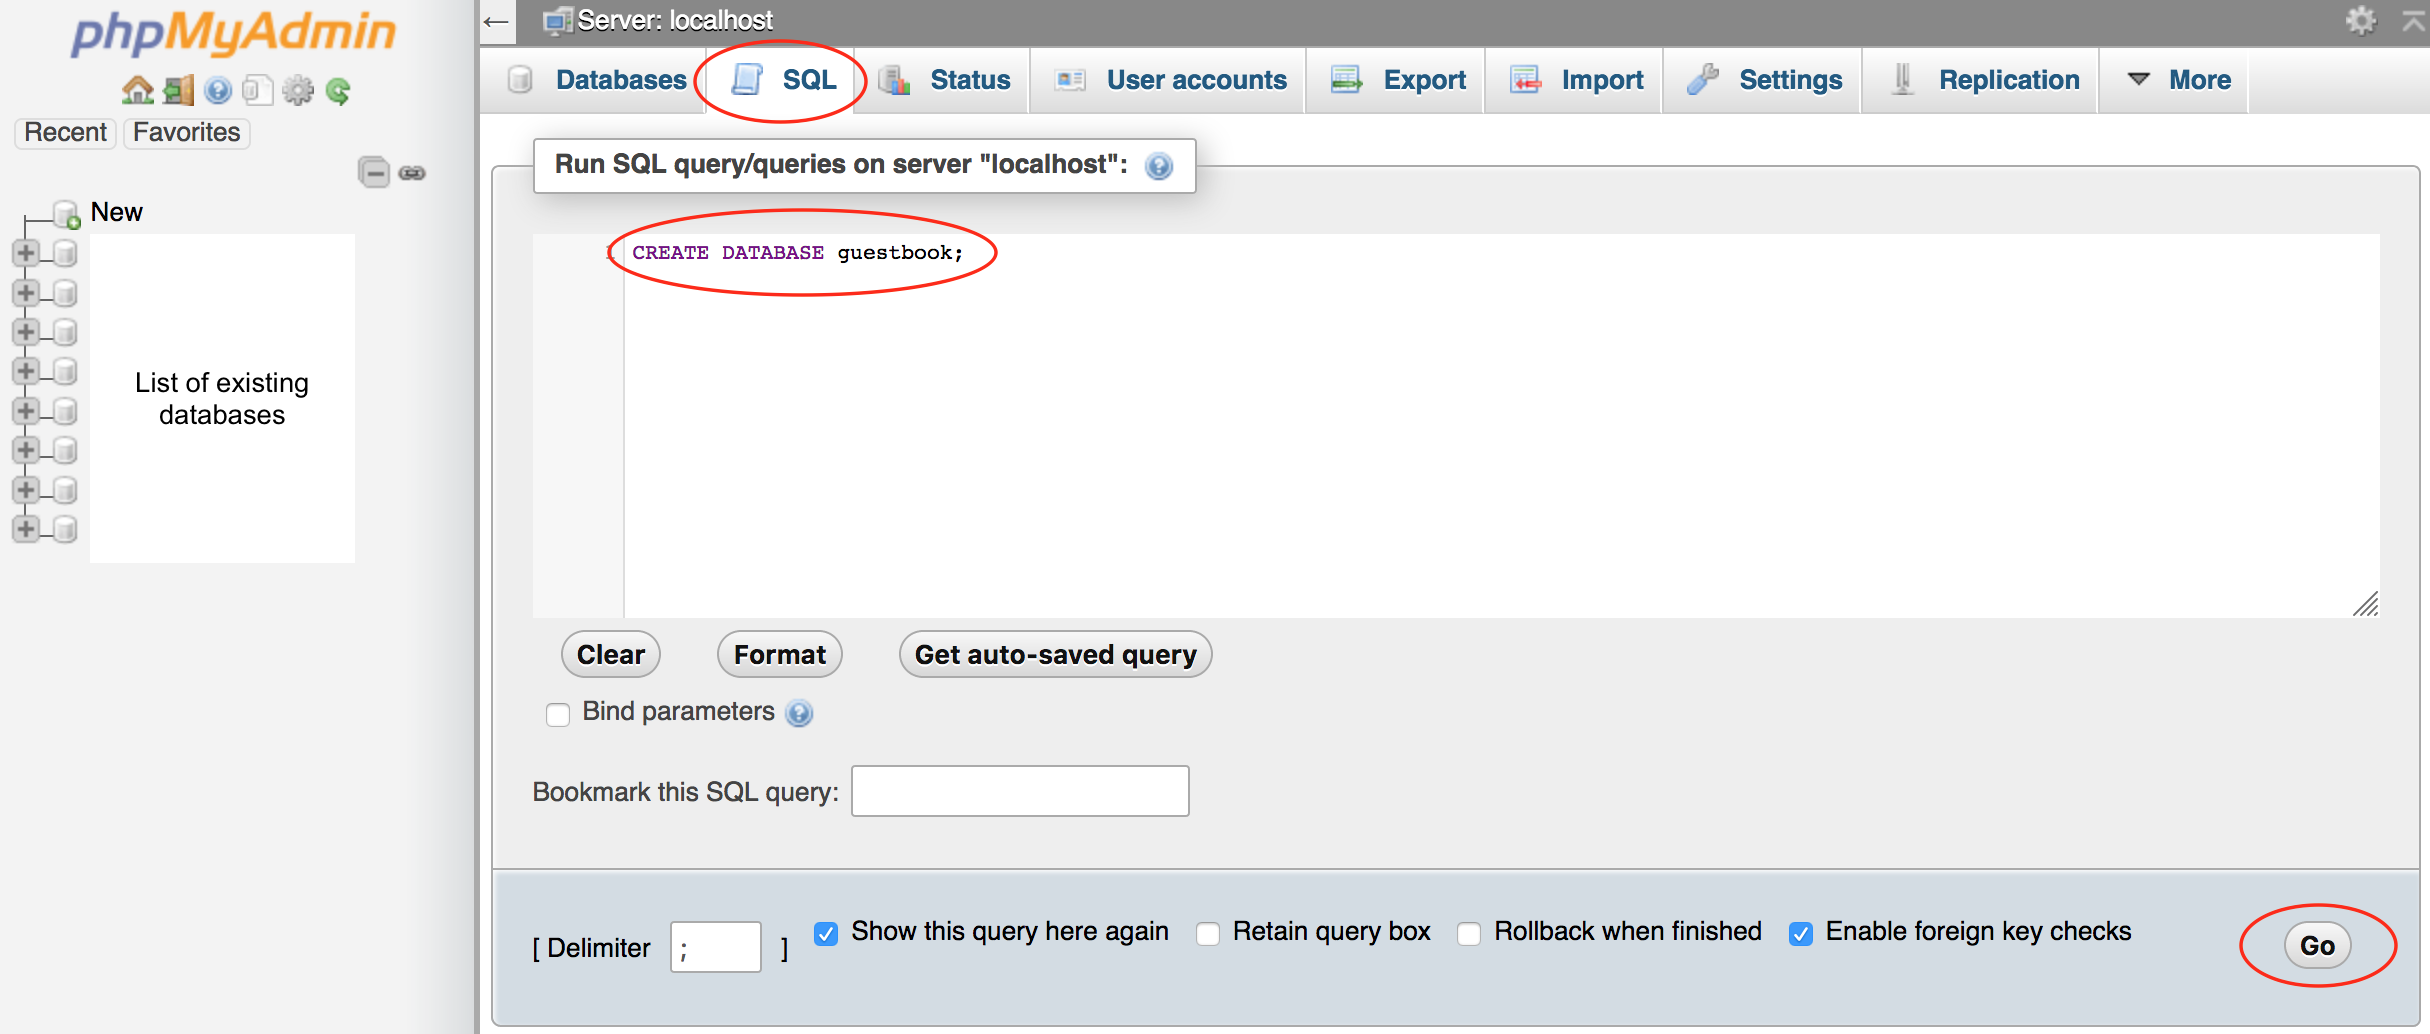
You may run the SQL command to create a database.
- On the phpMyAdmin screen, select the SQL tab
- Enter
CREATE DATABASE guestbook;
Note: SQL commands are not case sensitive. This example uses uppercase and lowercase simply to make it easy to read. - Click the 聽Go聽 button to run the command.
- For Mac users, you may press Control+Enter to run
- For Windows users, you may press Control+Enter to run
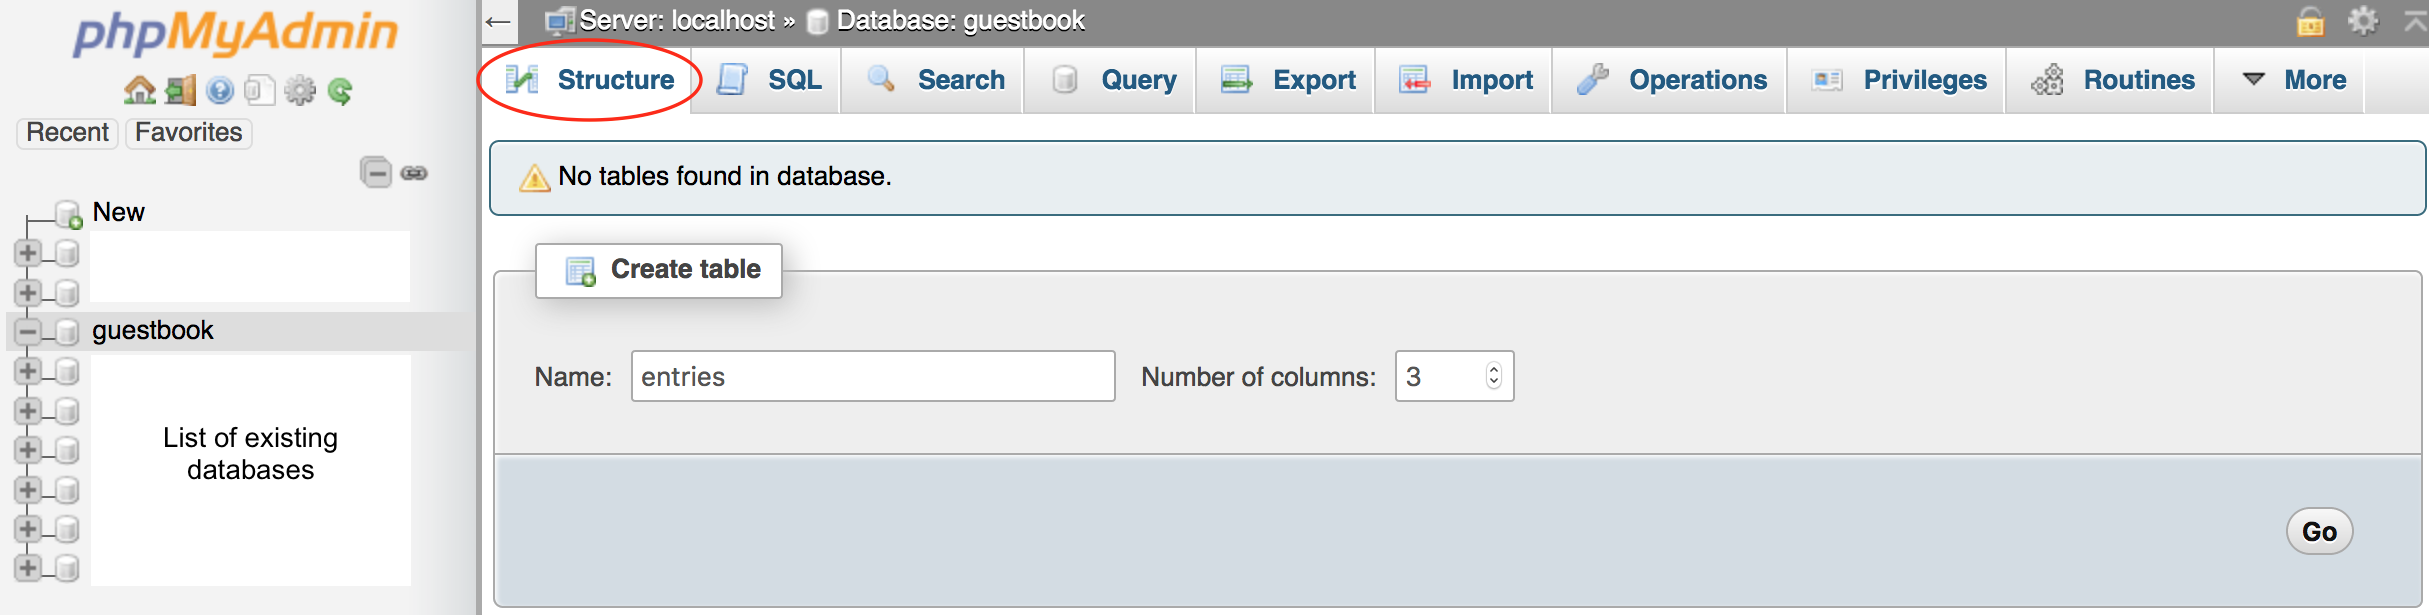
Create a table
Let’s create a table named entries. To create a table, there are several options.You may use the Create table
feature.
- On the phpMyAdmin screen, select the guestbook database.
- Select the Structure tab.
- Under the Create table, enter a table name and the number of columns.
- Click the Go button. This will prompt you to enter the column information.
You may run the SQL command to create a table.
- On the phpMyAdmin screen, select the SQL tab
- Enter the following code
USE guestbook; CREATE TABLE entries (guestName VARCHAR(255), content VARCHAR(255), entryID INT NOT NULL AUTO_INCREMENT, PRIMARY KEY(entryID));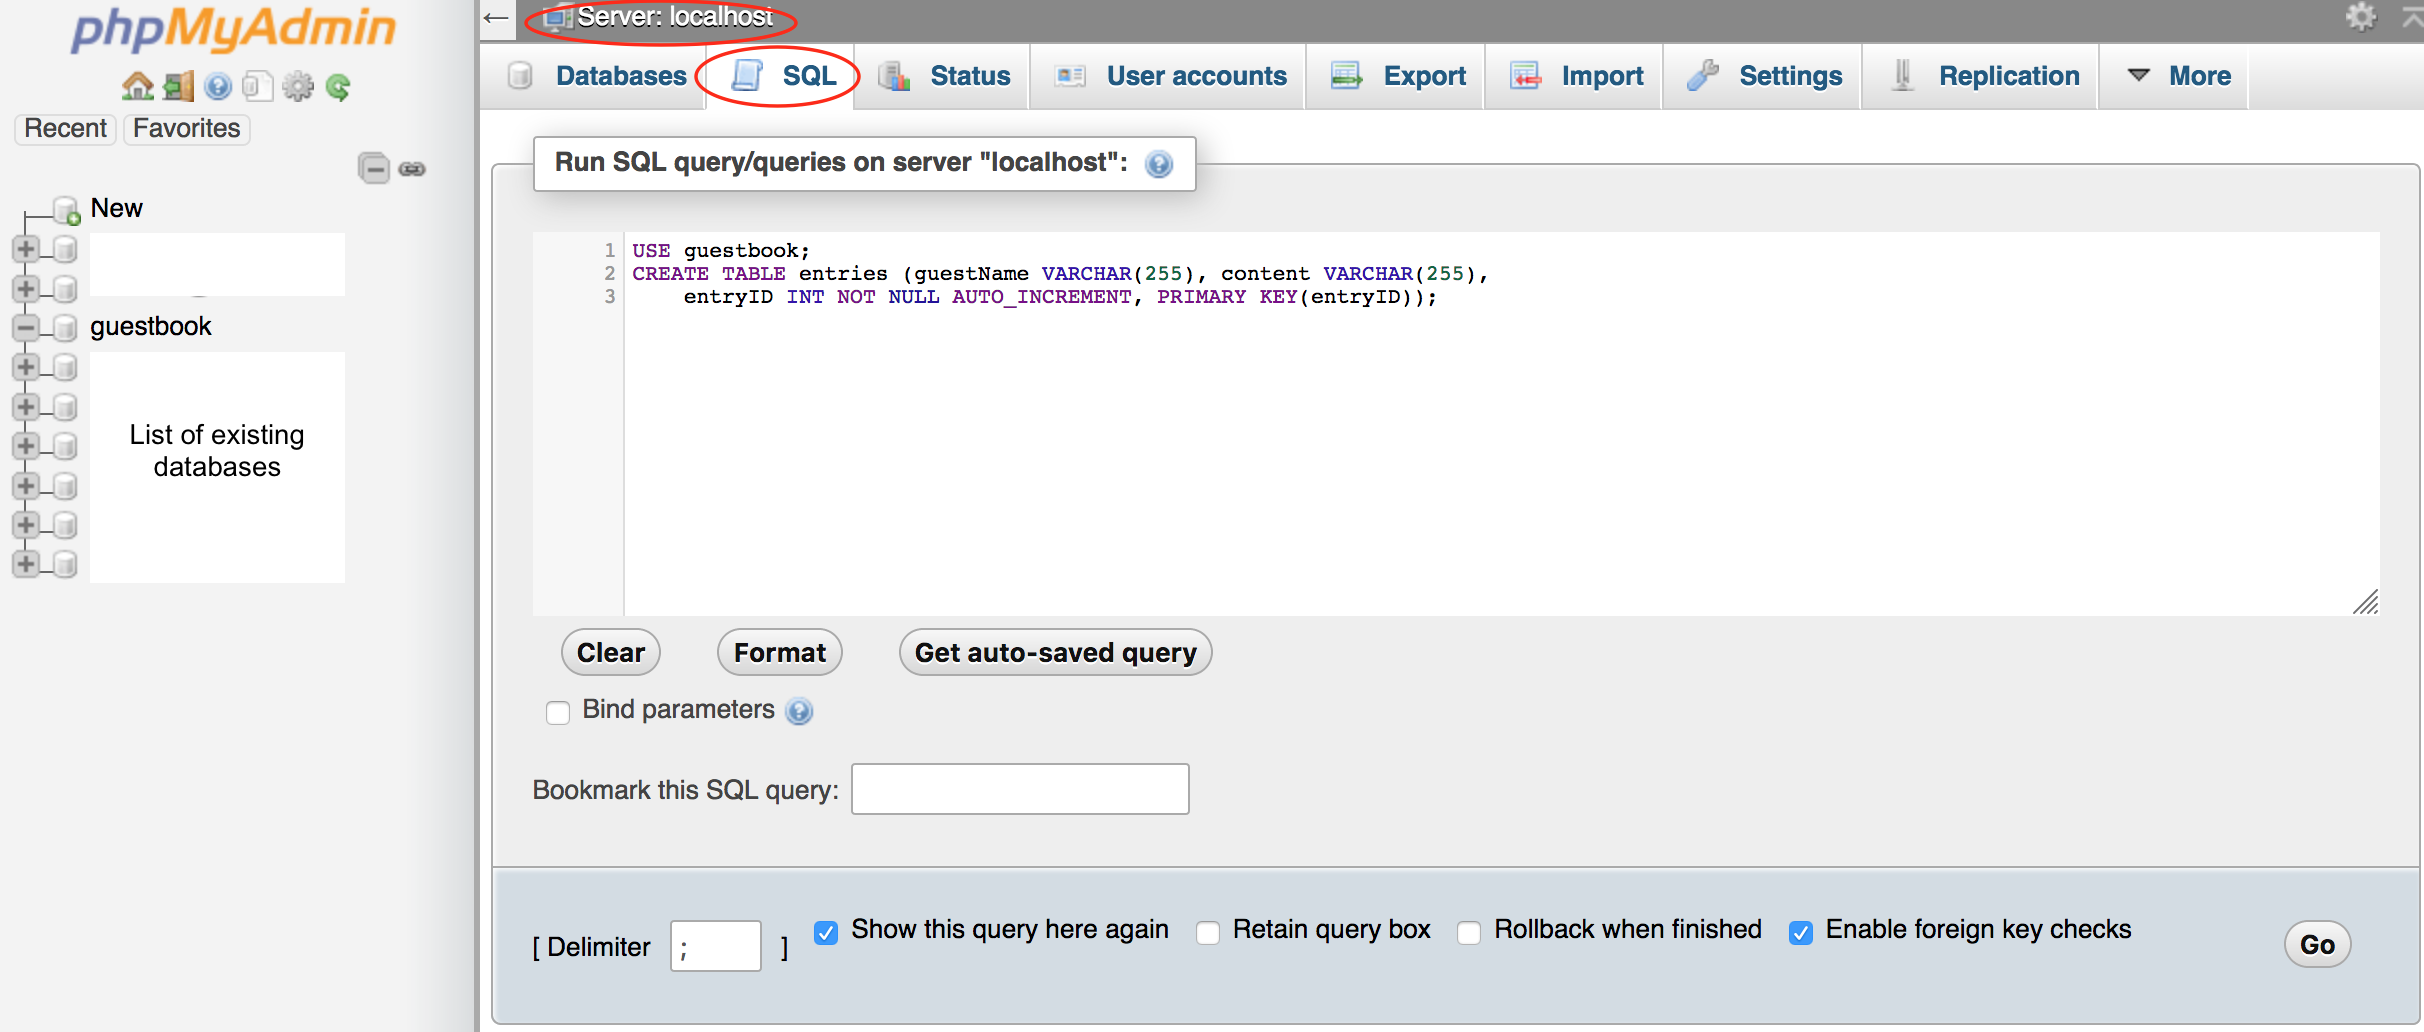 If you already selected the guestbook database (on the left panel), no need to include
 USE guestbookin your SQL to run.
- Click the 聽Go聽 button to run the command.
- For Mac users, you may press Control+Enter to run
- For Windows users, you may press Control+Enter to run
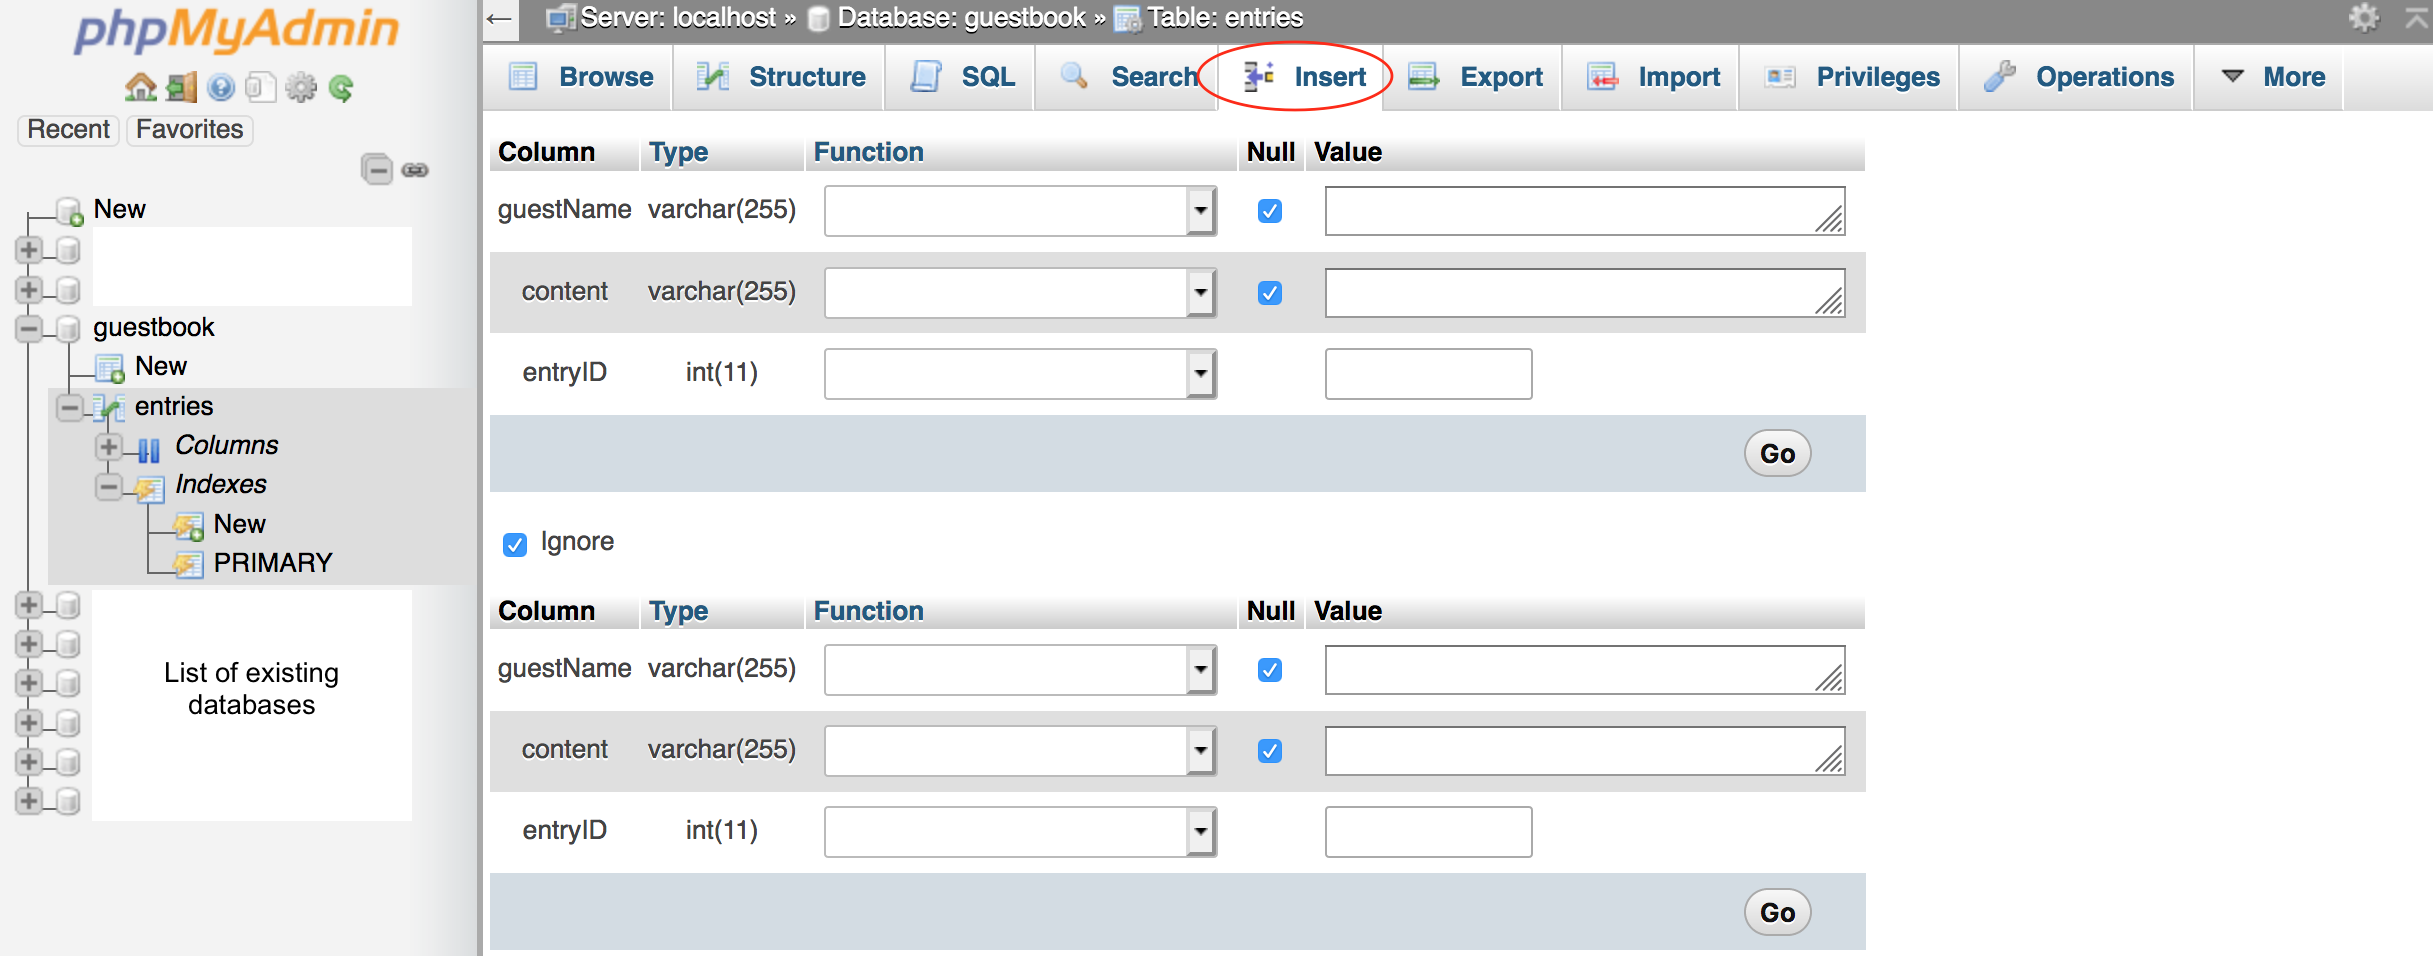
Insert data
To insert data into a table, there are several options.You may use the Insert
feature.
- On the phpMyAdmin screen, select the guestbook database, select the entries table.
- Select the Insert tab.
- For each record of data to be inserted, enter the value for each column.
- Click the Go button.
You may run the SQL command to insert data.
- On the phpMyAdmin screen, select the guestbook database, select the entries table.
- Select the SQL tab
- Enter the following code
INSERT INTO entries (guestName, content) values (“Humpty”, “Humpty’s here!”); INSERT INTO entries (guestName, content) values (“Dumpty”, “Dumpty’s here too!”);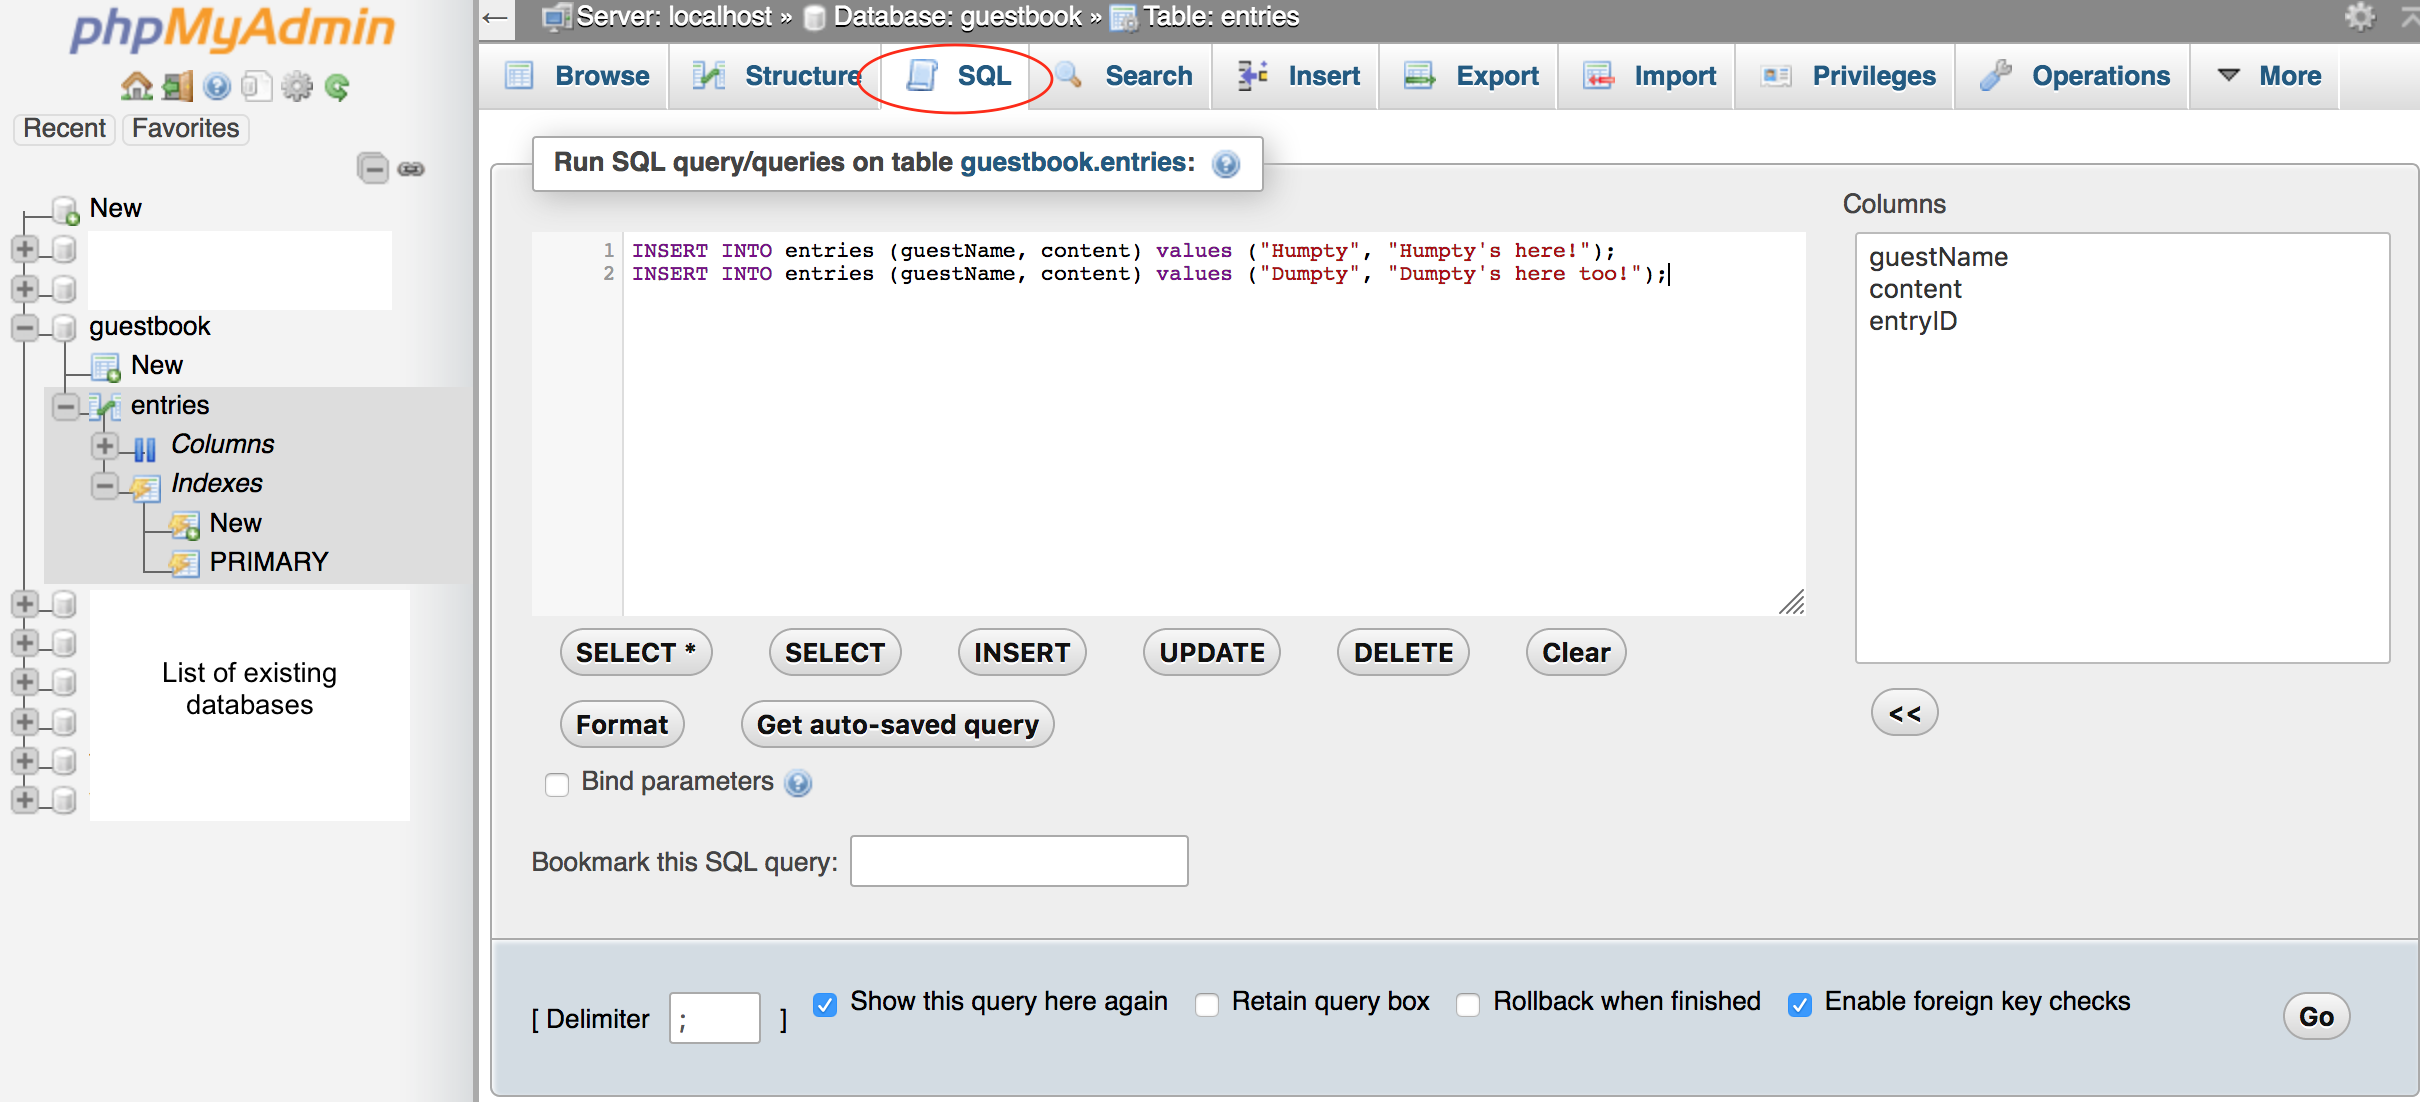
- Click the 聽Go聽 button to run the command.
- For Mac users, you may press Control+Enter to run
- For Windows users, you may press Control+Enter to run
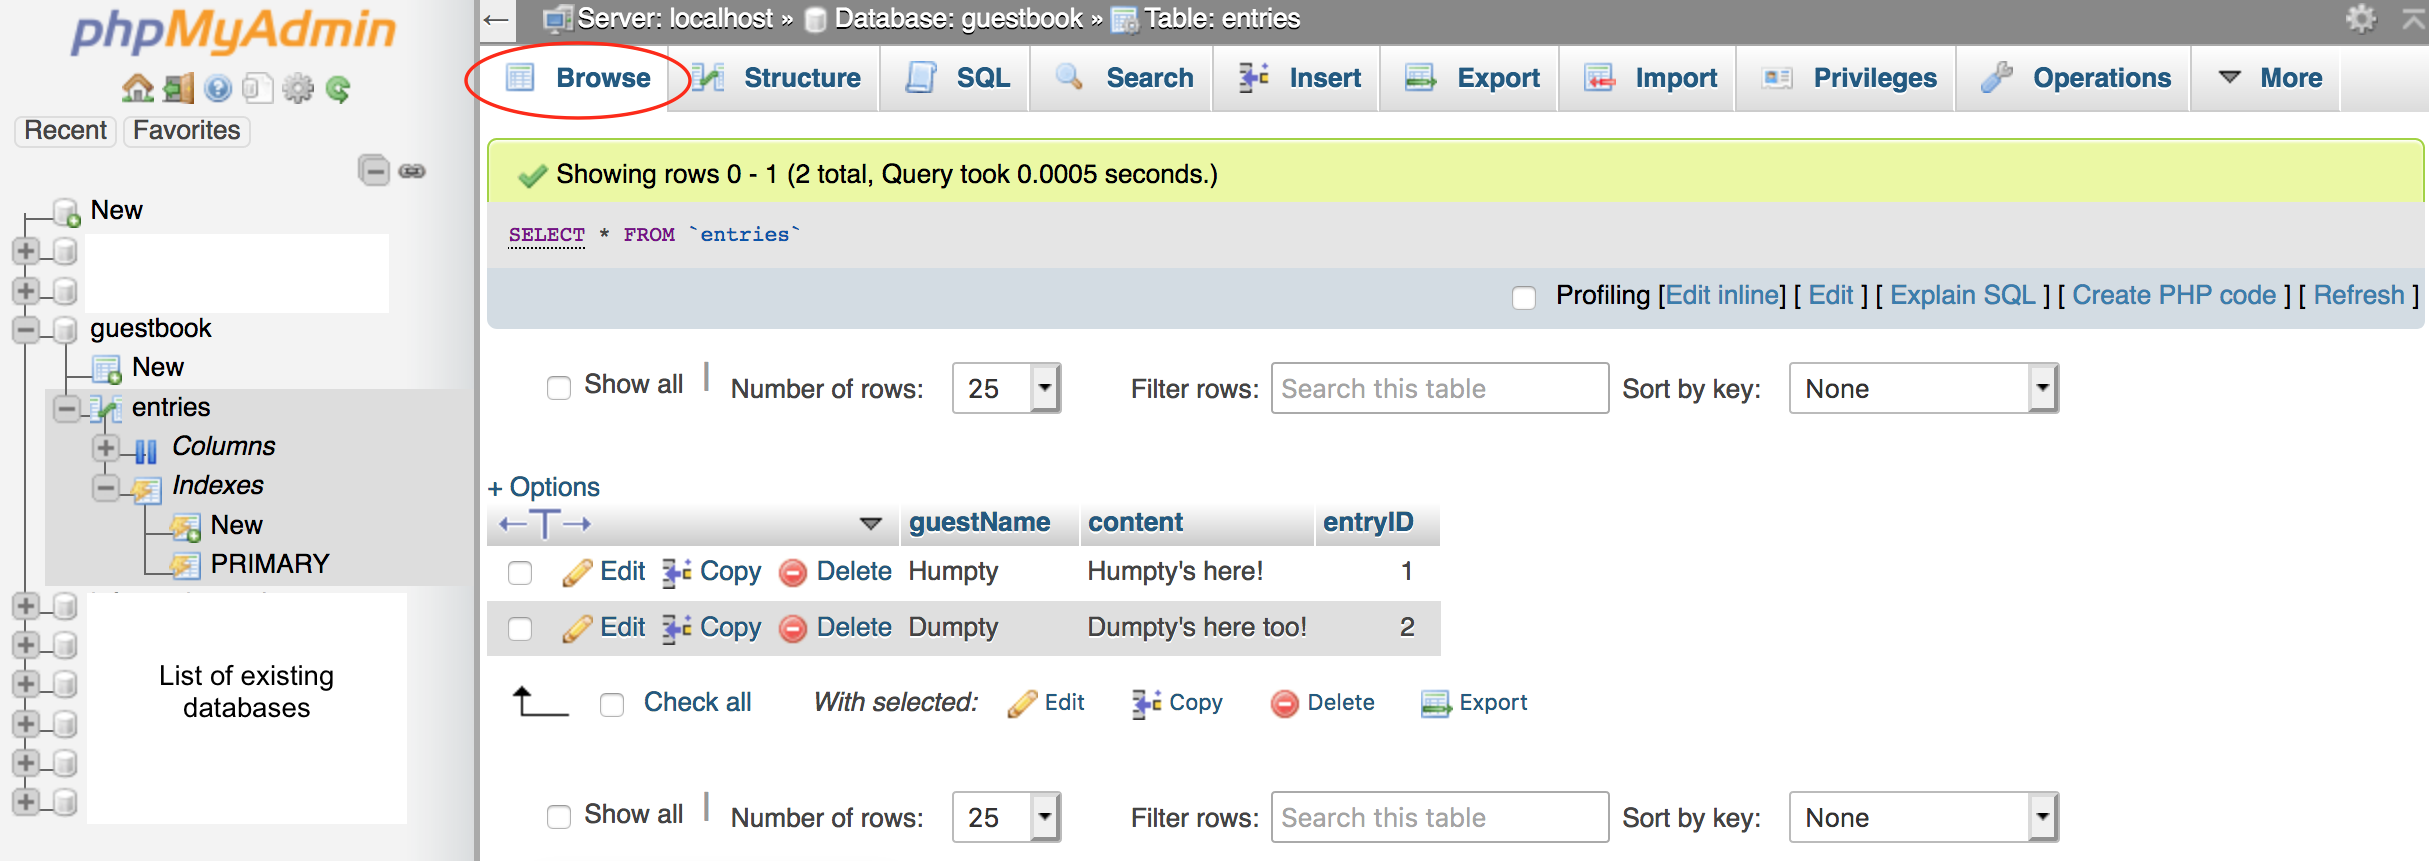
Retrieve data
To retrieve data from a table, there are several options.You may use the Browse
feature.
- On the phpMyAdmin screen, select the guestbook database, select the entries table.
- Select the Browse tab. This will display all existing records of the table.
You may run the SQL command to retrieve data.
- On the phpMyAdmin screen, select the guestbook database, select the entries table.
- Select the SQL tab
- Enter the following code
SELECT * FROM entries;
- Click the 聽Go聽 button to run the command.
- For Mac users, you may press Control+Enter to run
- For Windows users, you may press Control+Enter to run
Import SQL file
- Create a blank file named friendbook.sql. Paste the following content in the fileCREATE TABLE friends (friendName VARCHAR(255), phone VARCHAR(255), entryID INT NOT NULL AUTO_INCREMENT, PRIMARY KEY(entryID)); INSERT INTO friends (friendName, phone) values (“Humpty”, “111-111-1111”); INSERT INTO friends (friendName, phone) values (“Dumpty”, “222-222-2222”);
- On the phpMyAdmin screen, select the guestbook database
- Select the Import tab
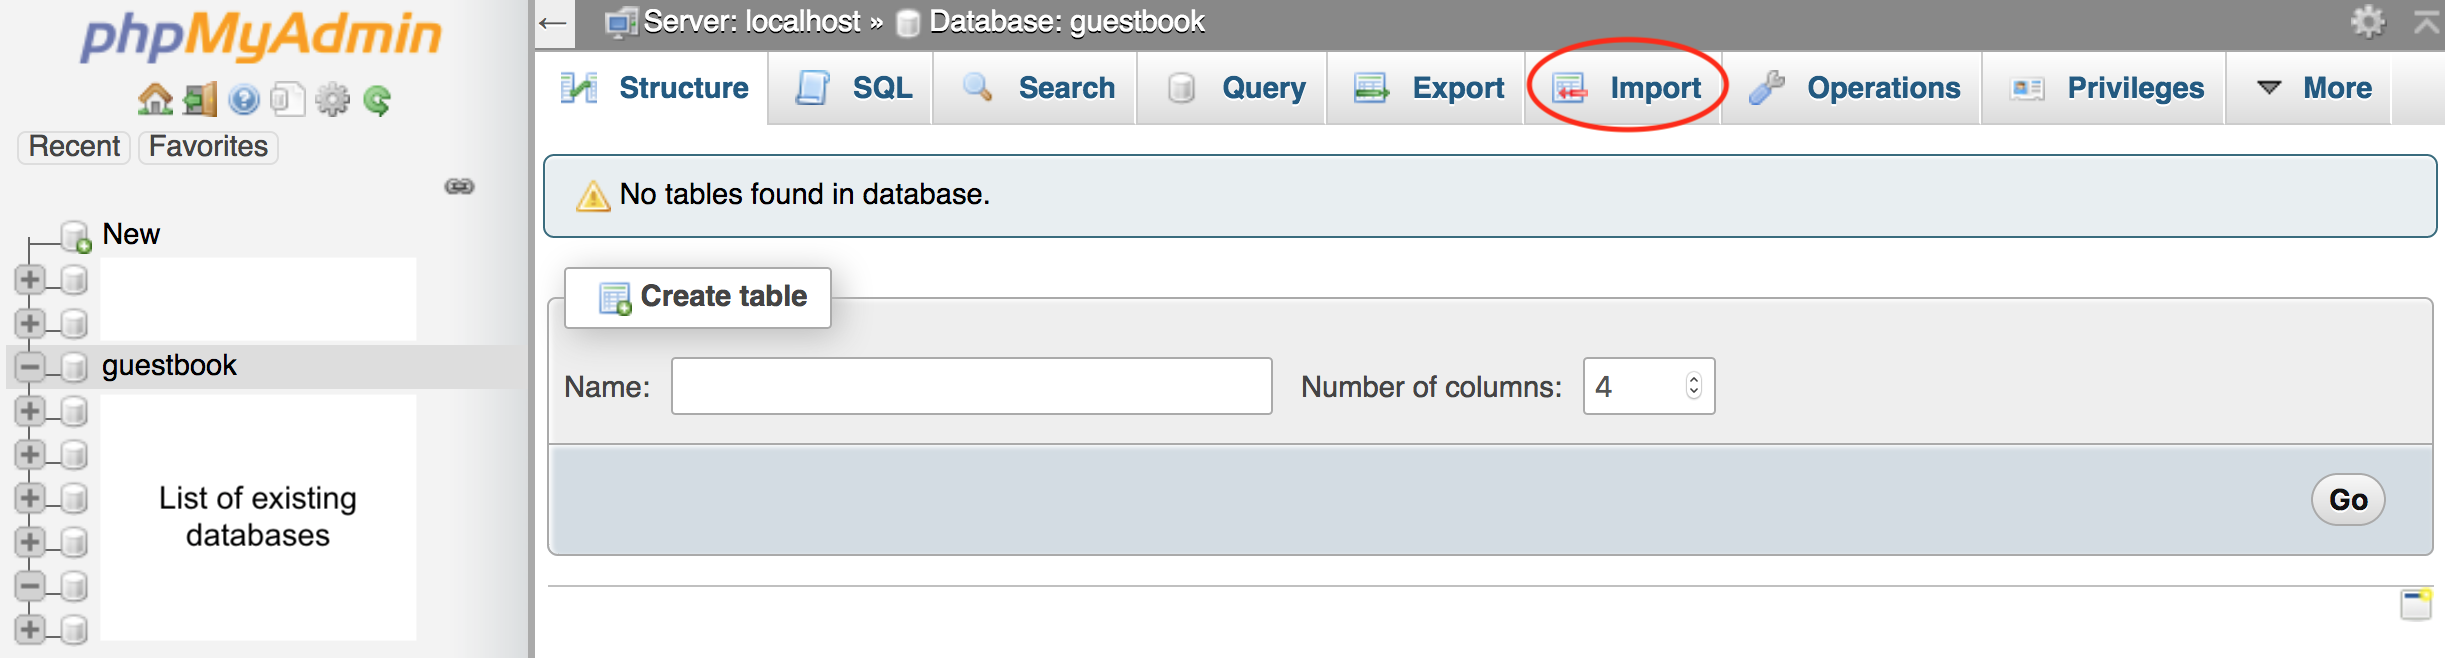
- Choose the .sql file to import
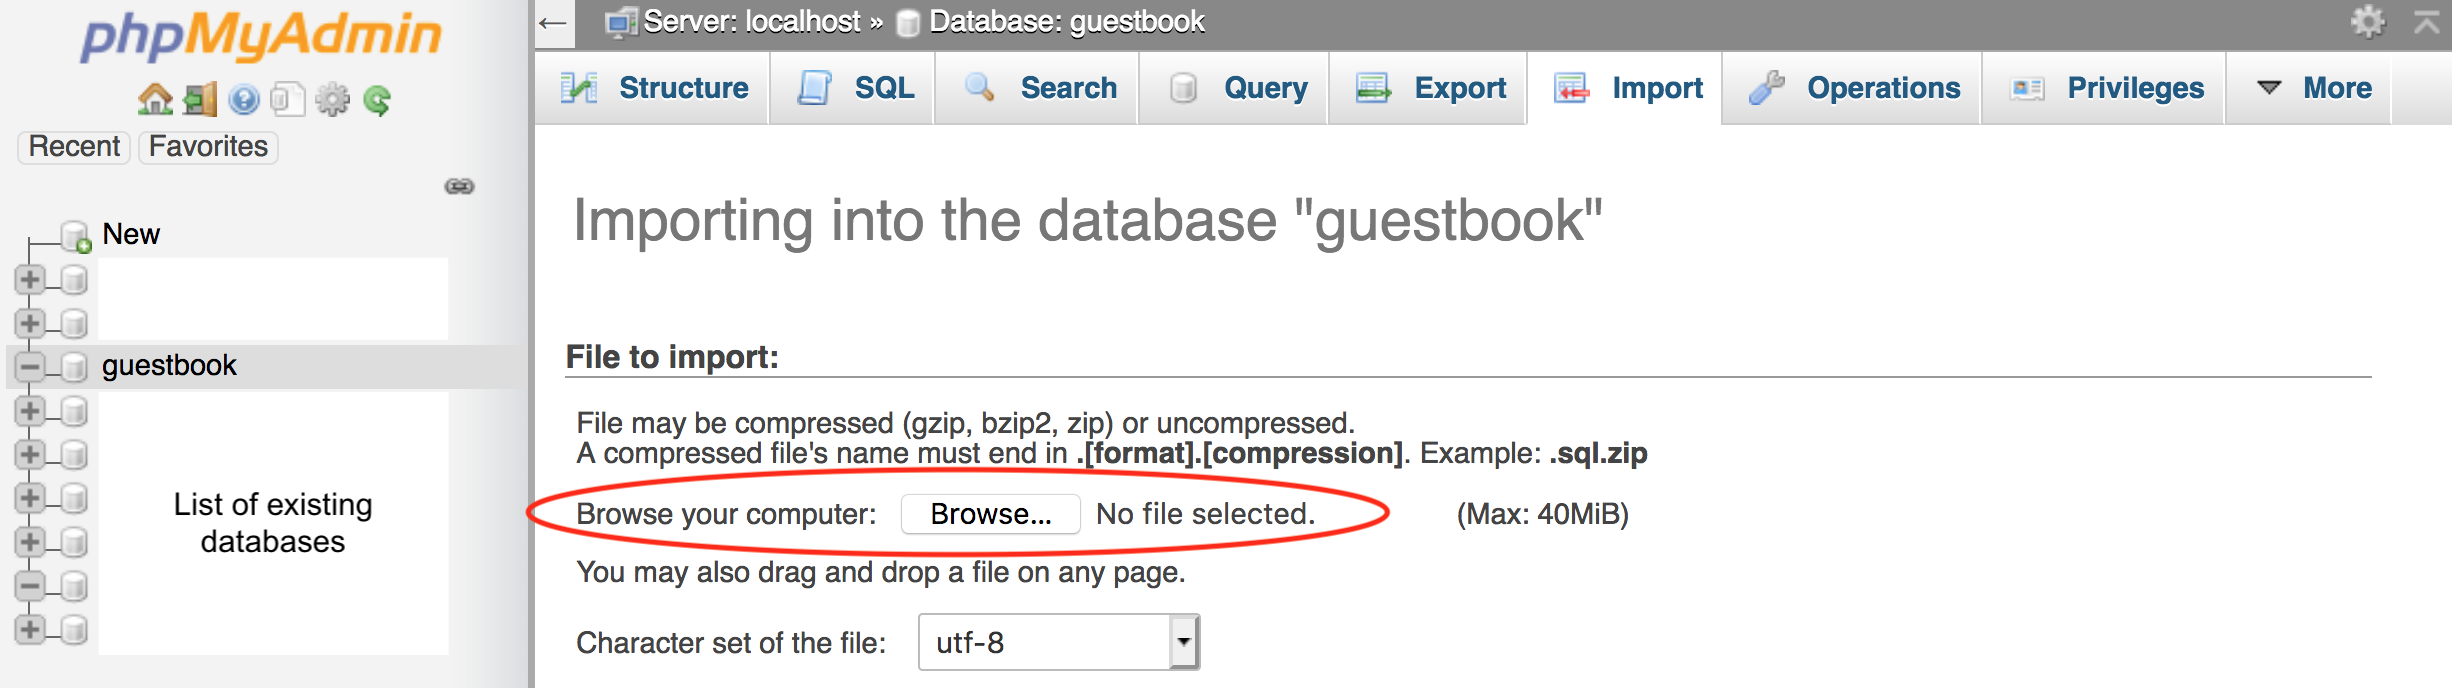
- Click the 聽Go聽 button to run the command.
- For Mac users, you may press Control+Enter to run
- For Windows users, you may press Control+Enter to run
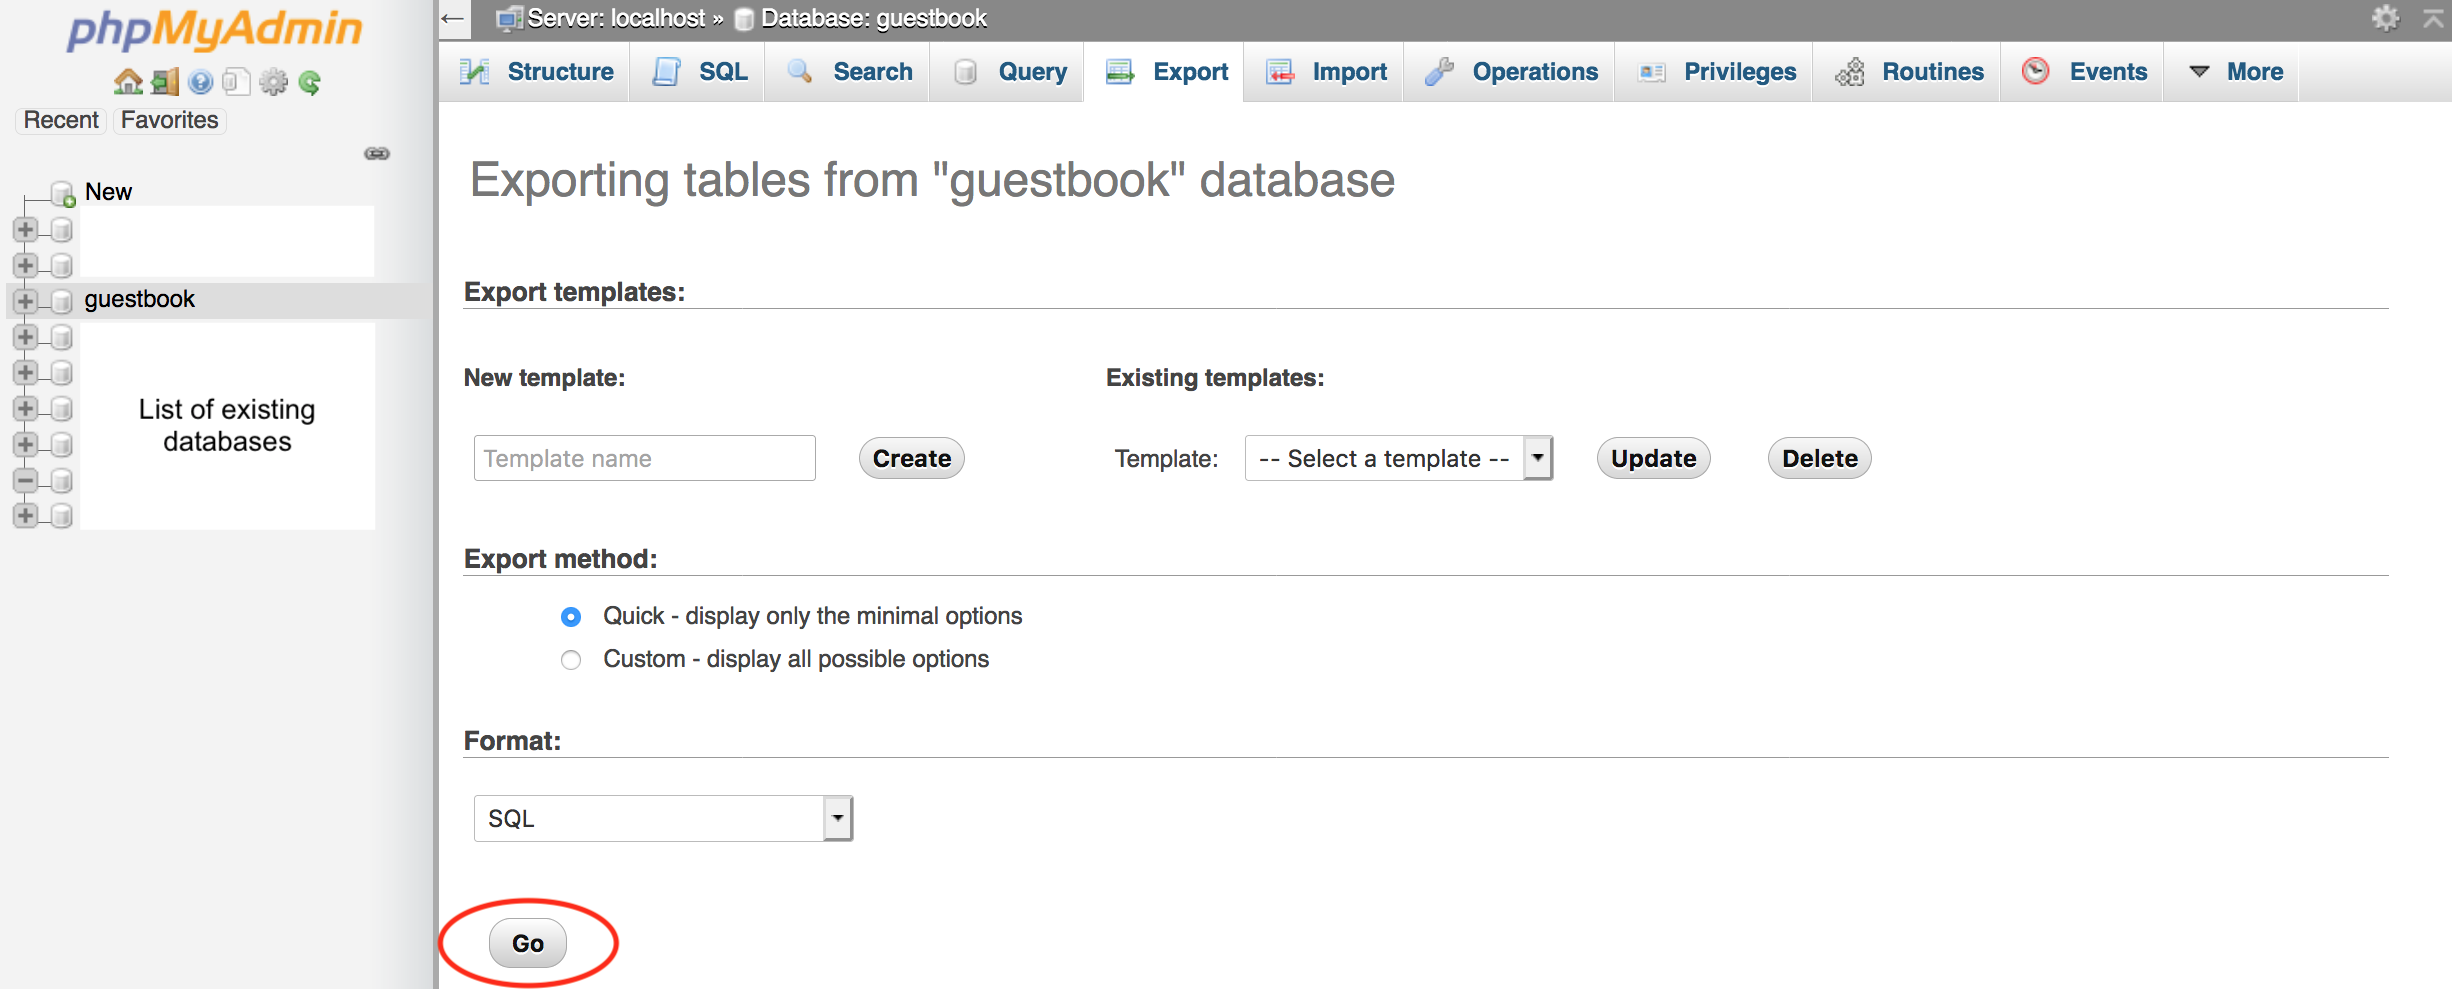
Export SQL file (back up your database)
- On the phpMyAdmin screen, select the guestbook database
- Select the Export tab
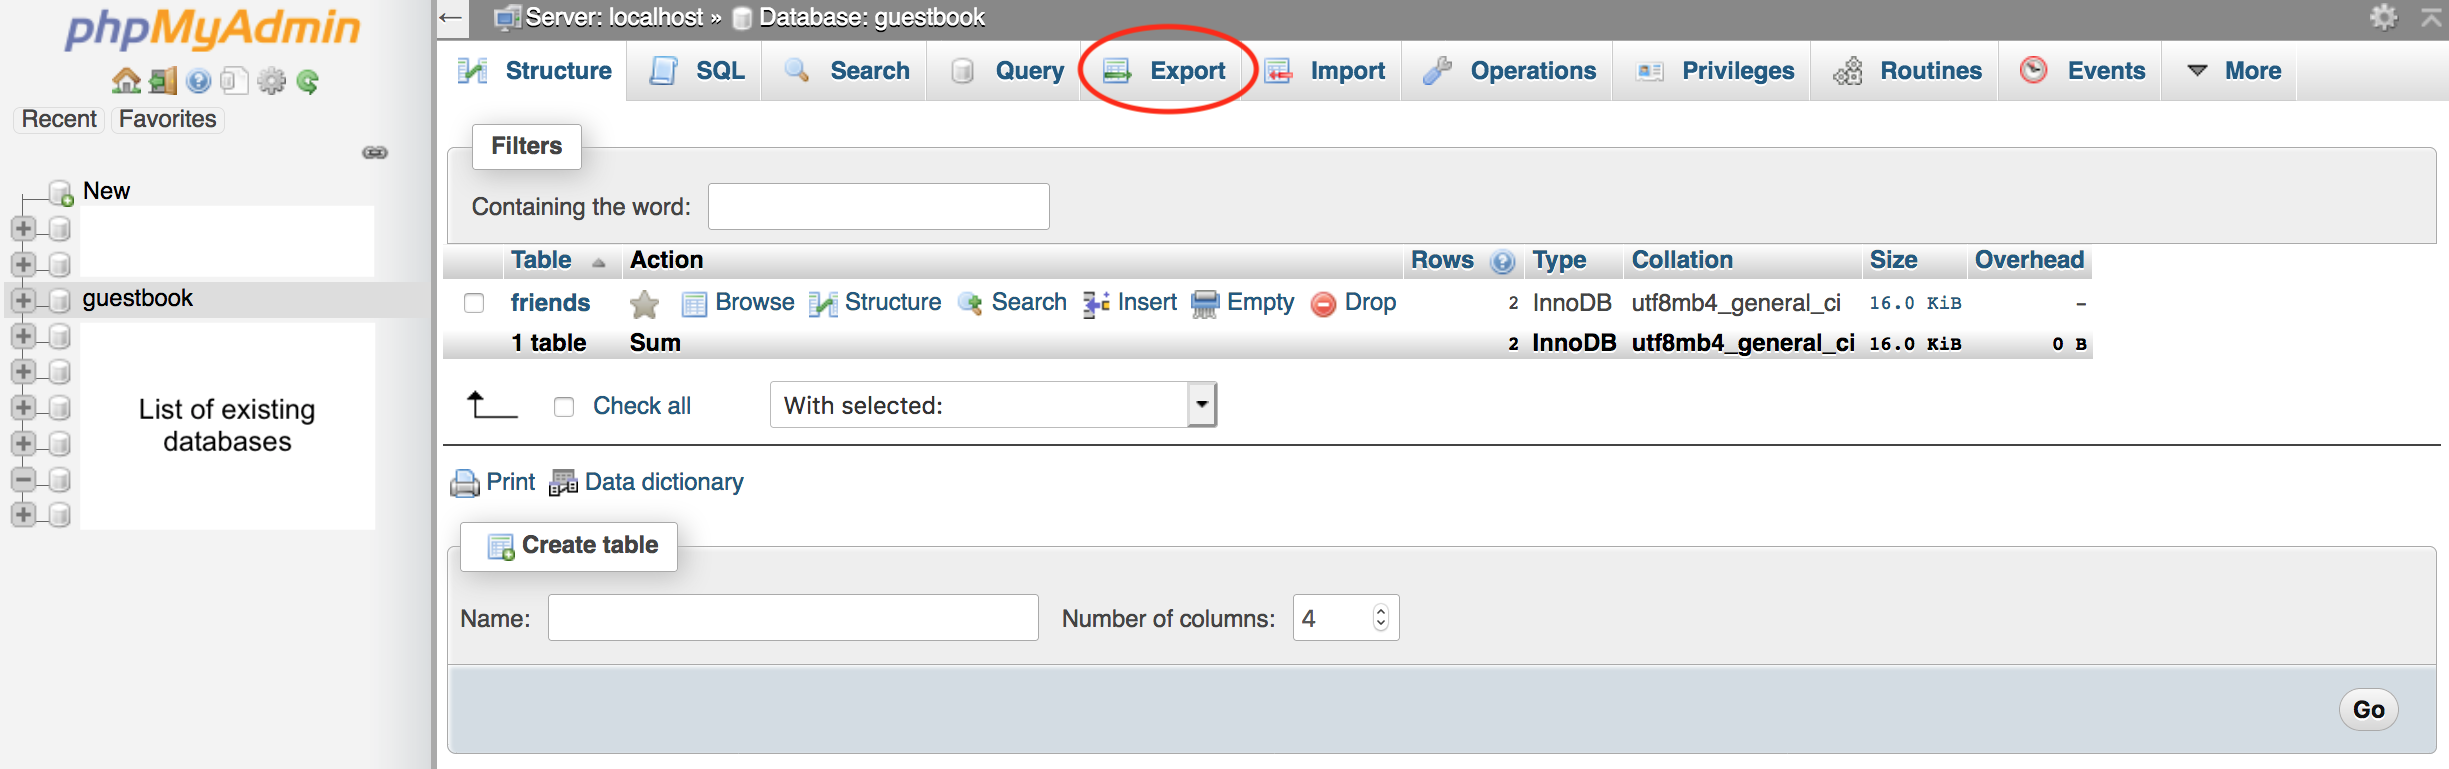
- Click the 聽Go聽 button to run the command.
- For Mac users, you may press Control+Enter to run
- For Windows users, you may press Control+Enter to run
how to use xampp for mysql
- Download the “small databases” ZIP file (linked from schedule page) to your computer;
- extract the three
.sqlfiles (simpsons,world, andimdb_small) - Make sure that
mySQLis running on your system (XAMPP control panel)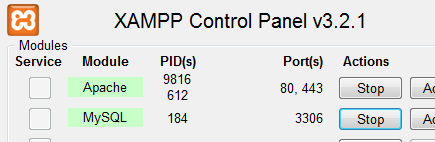
- In a web browser, go to
localhost/phpmyadmin
(on some systems,phpMyAdmin)
- It is recommended that you create a password for the root account (I’m not sure how to recover your data if you ever forget the password)
- In phpmyadmin, click the
Userstab at the top. - Find the row that has User root and Host 127.0.0.1

- Click
Edit Privileges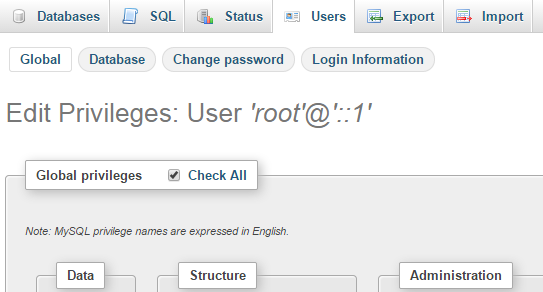
- Click
Change password - Enter the password twice (write it down somewhere if you’re not sure you can remember it)
- Click the
Gobutton - Repeat this process for
rootatlocalhost, using the same password
- In phpmyadmin, click the
- At this point you may not be able to connect to phpmyadmin.
Go to theC:\xampp\phpMyAdminthe folder, edit the fileconfig.inc.php(on some systems it is calledconfig.default.php),
to set$cfg['Servers'][$i]['password'] = 'yourrootpassword';.
Note: if you use Notepad to edit this file, it may appear to be all on one line.
I recommend that you use a better editor, such as Notepad++ or Eclipse. - You should now be able to connect to
phpmyadminagain. - Click
Databasestab at the top of the page.- Under
Create Database, typesimpsonsfor the name, chooseutf8_general_cifor the collation, and click theCreatebutton - Do the same for
worldandimdb_small
- Under
- Populate the
simpsonsdatabase: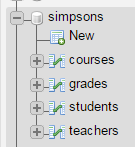
- In the left column (Navigation frame), click
simpsons - Click
Importfrom the top of the page, then clickChhose File - Browse to where you extracted the files in step 1, then choose
simpsons.sql - Click
Go - You should see the four table names (courses, grades, students, teachers) in the left column
- Click one of those names to see its contents
- In the left column (Navigation frame), click
- Repeat the previous step for
worldandimdb_smalldatabases - You should now be ready to do some queries:
how to export database in xampp
First, Open Your PhpMyAdmin
Here I am using the XAMPP server I have started XAMPP Apache and MySql Services.
Click on XAMPP MySql Admin it will open the following page
You can open directly http://localhost/phpmyadmin聽if your server is running with Apache and MySql services.
Select Your Database
On the left-hand side, it shows the list of all databases available in Mysql.
Select the database to which to want to backup.
Here we are selecting testdb to export
Go To The Export Tab
Go to the export tab as shown in the below image
Export The Database By Clicking On The Go Button
As you are now in an export tab, below this tab you will find the Go button.
Above the Go button, there are various formats to export data.
The different export format is as below
We have selected SQL and clicked on go.
It will download the database in the testdb.sql file
Export Method can be used to download all of a few tables from the database.
Export method type custom can be used to select tables to download.