


Table of contents
- How to publish a website on GitHub pages
- Step 1: Go to your website's repository
- Step 2: Select the settings
- Step 3: Go to GitHub Pages
- Step 4: Select the branch
- Step 5: All done
-
- Conclusion
GIT, which stands for Global Information Tracker, is a powerful and widely-used version control system commonly used for software development and other collaborative projects. It is a platform for storing, tracking, and managing project source code. It is also where you can publish your HTML website – and it is free to host here.
How to publish a website on GitHub pages
The step-by-step process of publishing your website on GitHub is as follows:
Note: Your website can only be published if you set the repository's visibility to public. If you want your reposito to deploy a website while it is private, upgrade your account to Pro.
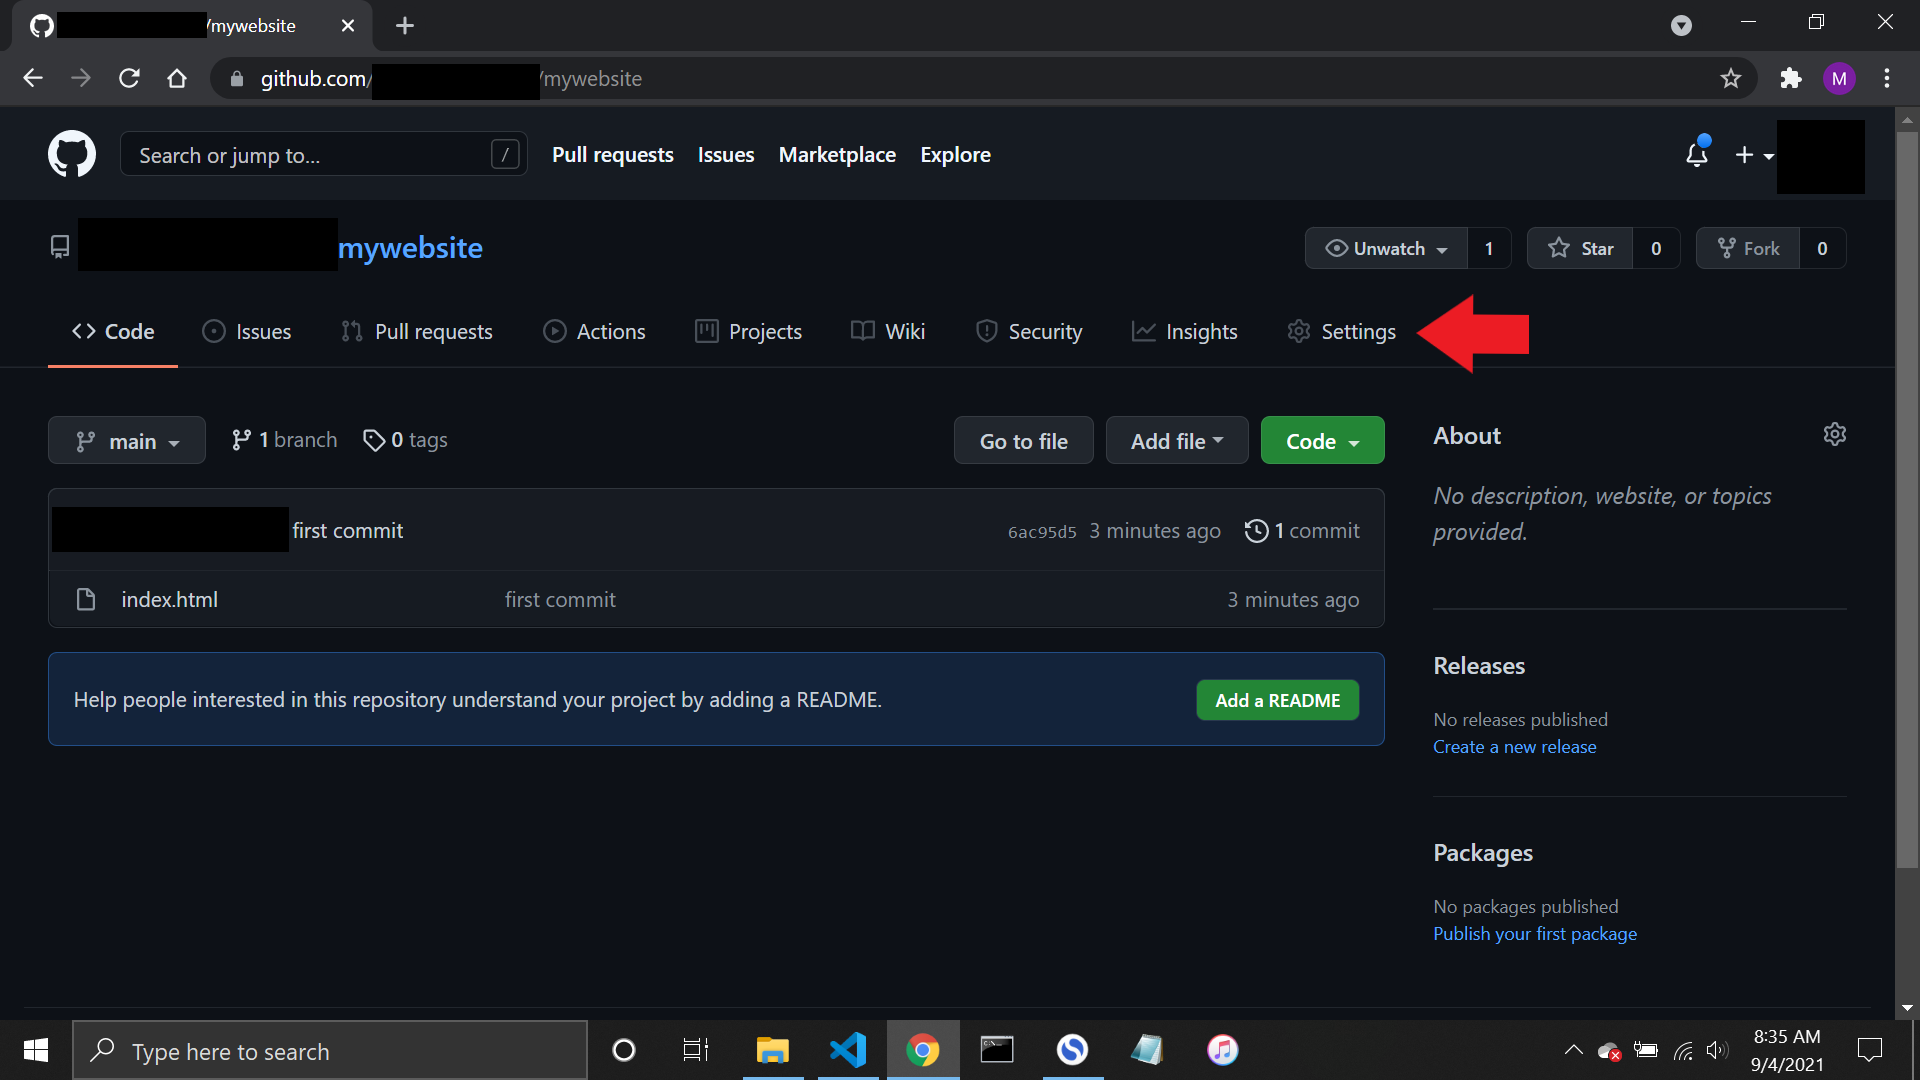
Step 1: Go to your website's repository
After you've logged in, go to the repository on the left sidebar and select the one you want to publish.
Step 2: Select the settings
In your repository, click the Settings link, and it will take you to the repository's settings page.
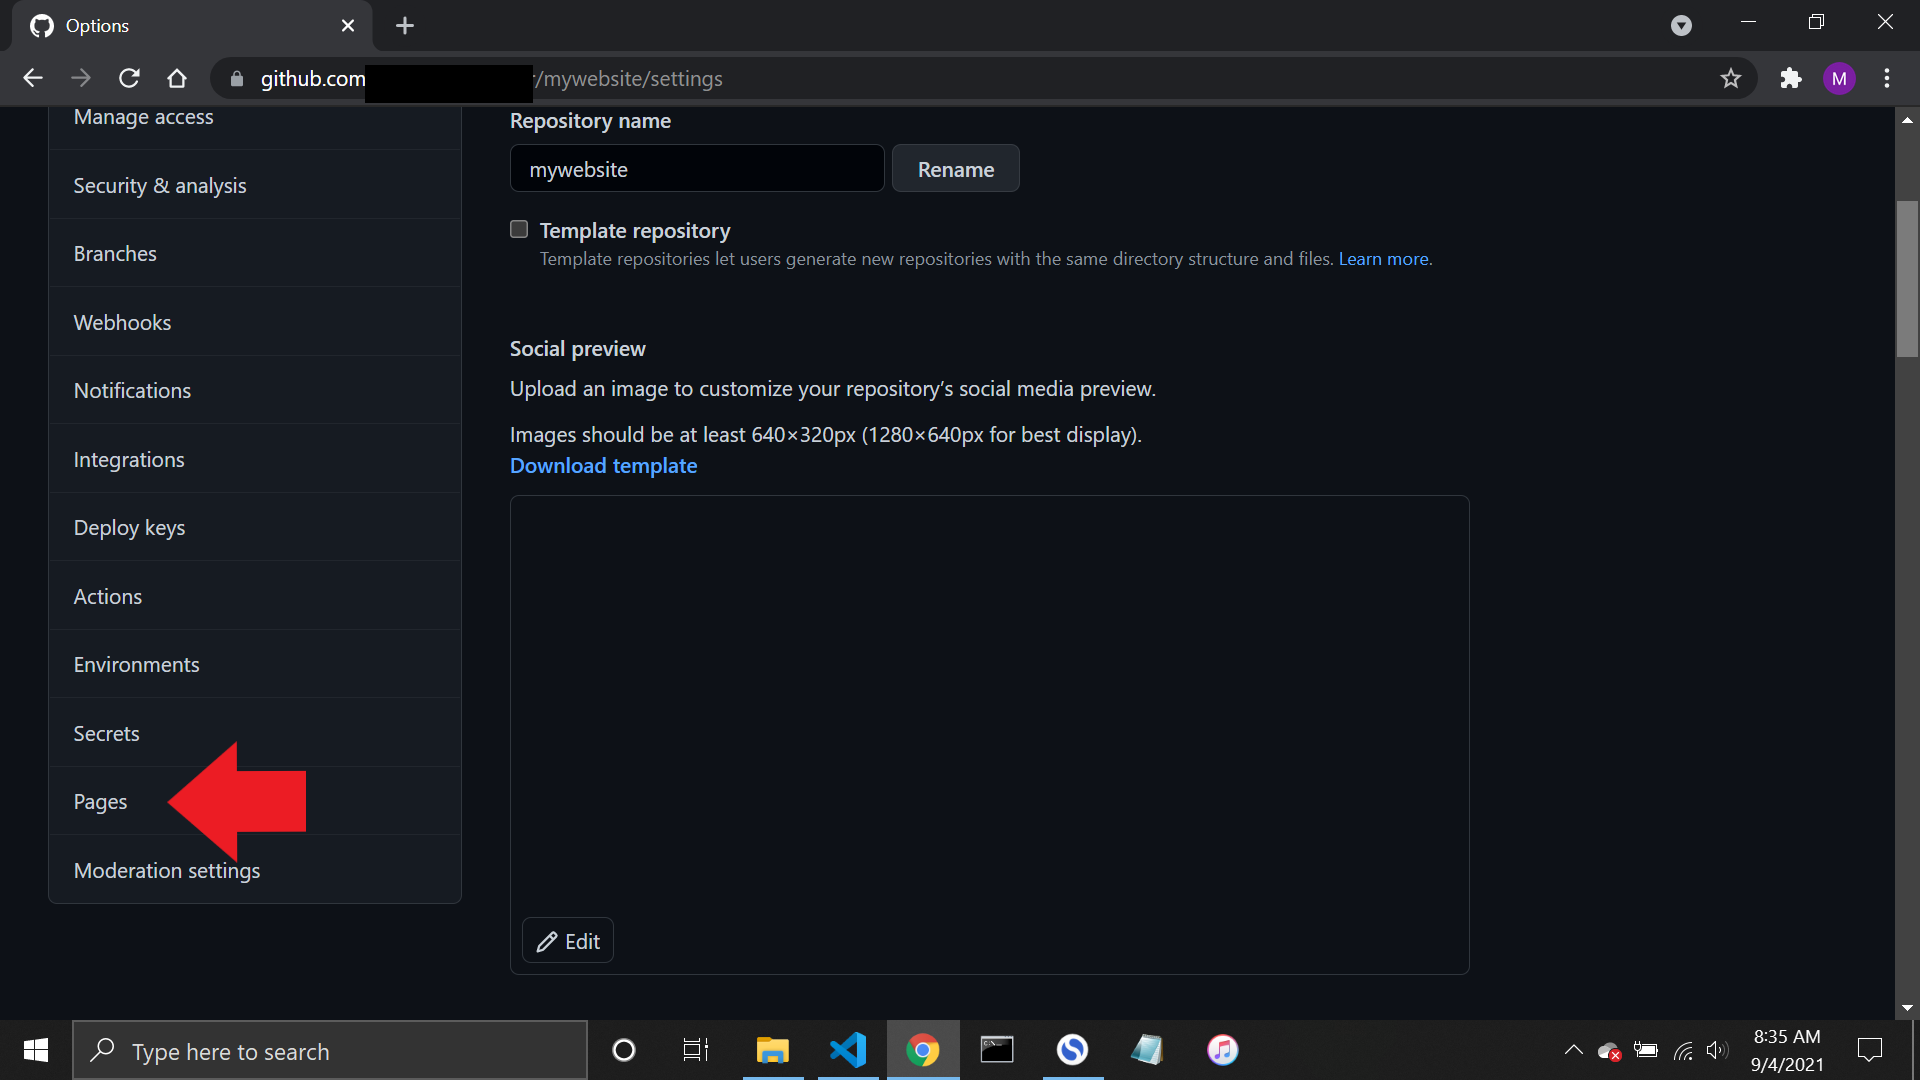
Step 3: Go to GitHub Pages
When you're in a repository's settings, scroll down a bit until you see the Pages link on the left sidebar. Click it, and it will lead you to GitHub Pages.
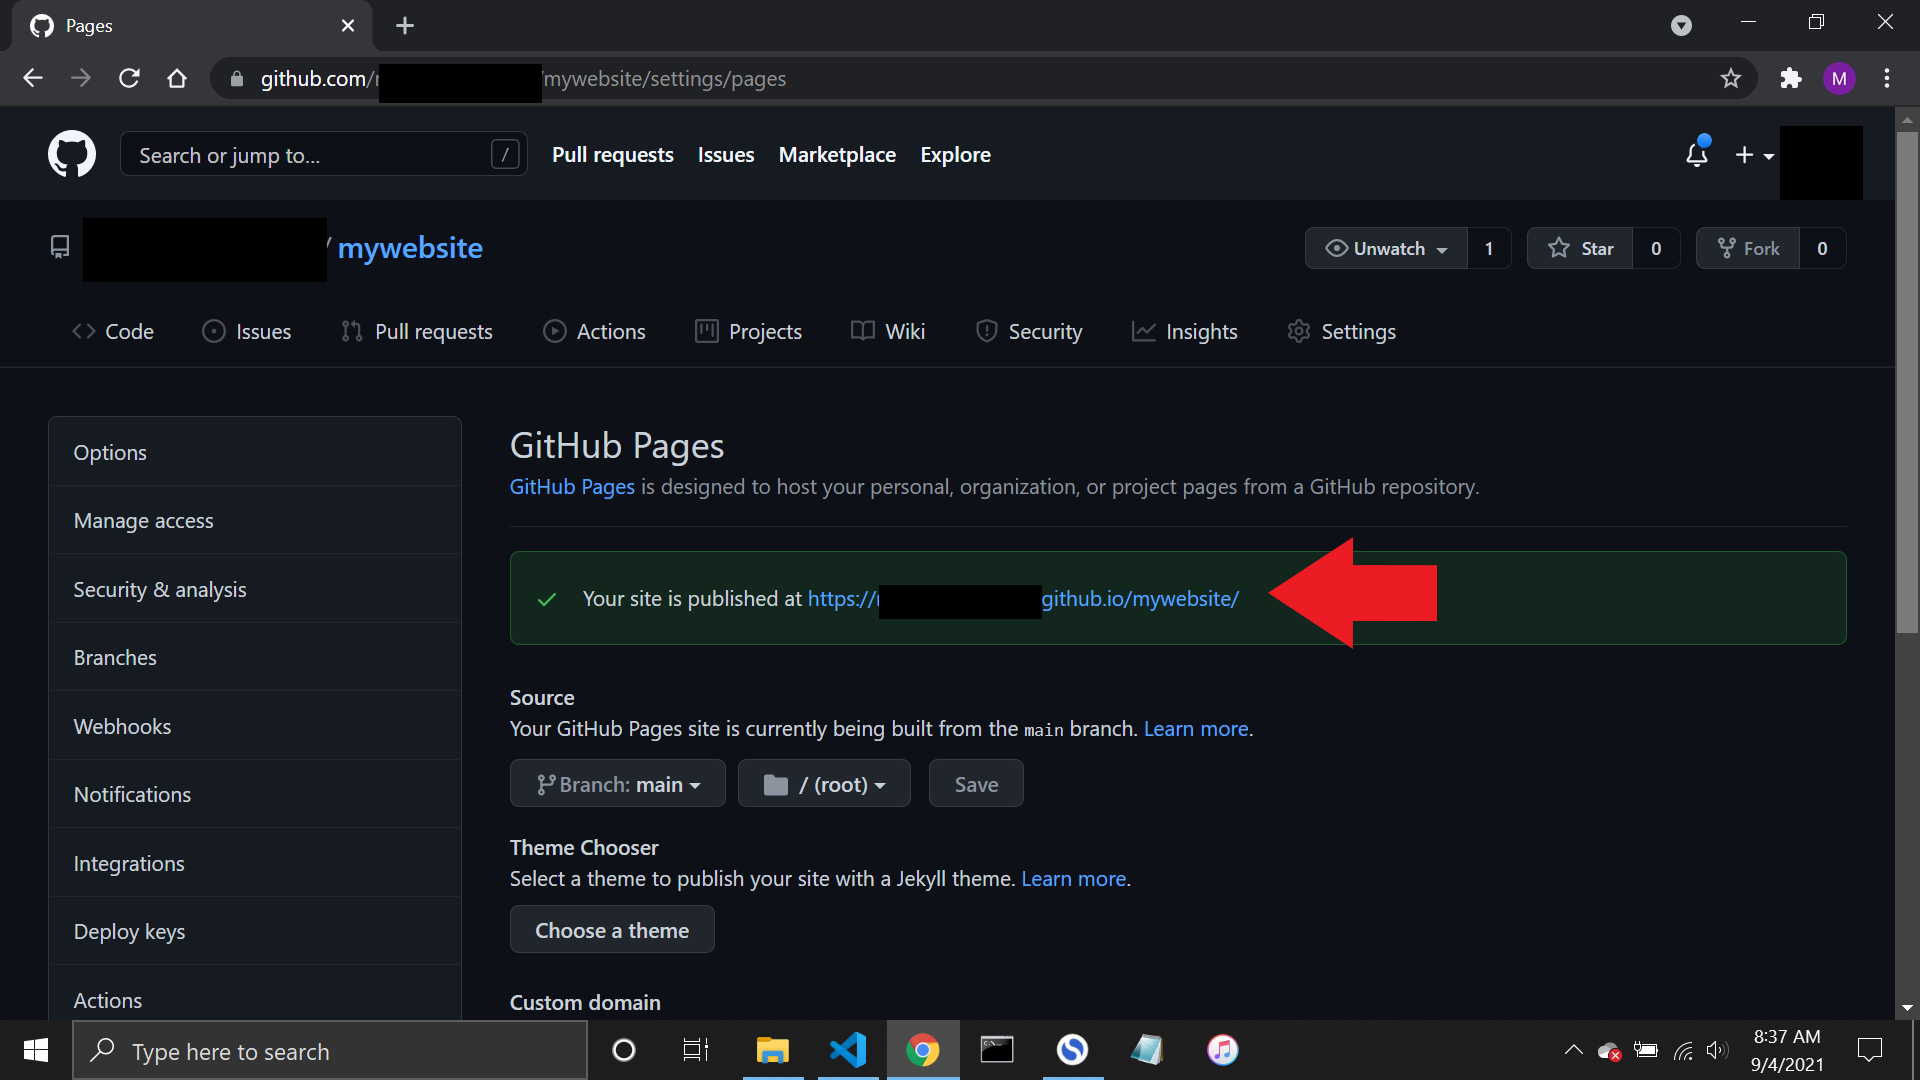
Step 4: Select the branch
In the source section, click the dropdown and select the master branch and save it. Depending on how you name it, it can be master or main.

Step 5: All done
And you are done! Your website will be published, and it will take only a minute or so to complete the process. Refresh the page, and you will see a link to your newly published website.
Conclusion
I hope you've found this tutorial helpful. You have learned how to publish your HTML website on GitHub. Now you can go ahead and show the world your incredible work.
#Vasyl 's pictures.